1.Requirements and high level steps
Requirements
Ubuntu 22.04 LTS — CentOS 8 is no longer supported.
MySQL 8.0
python3.10
Nginx 1.18.0
Seafile 9.0.x
Steps
Download and write the Ubuntu server 64 bit image to a micro SD card
Install Ubuntu server 64 bit OS on RPi
Configure External Storage
Install MySQL
Install Seafile
2.Install Ubuntu server 64 bit
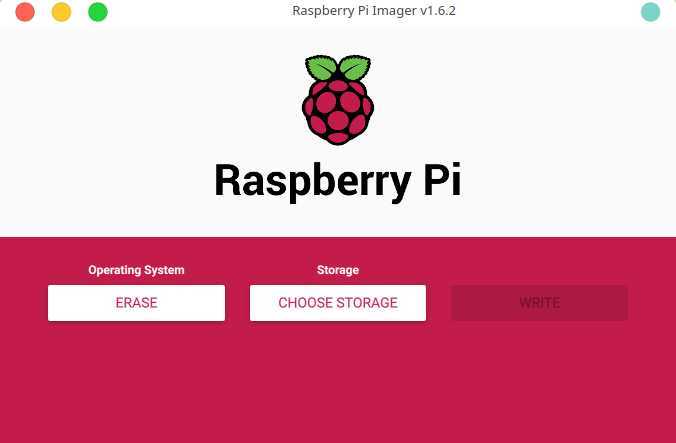
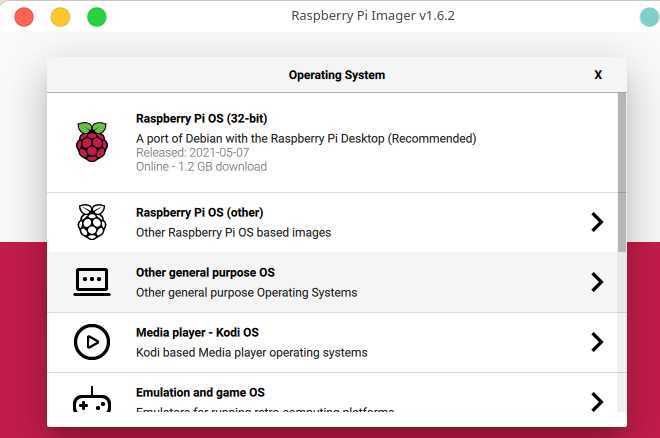
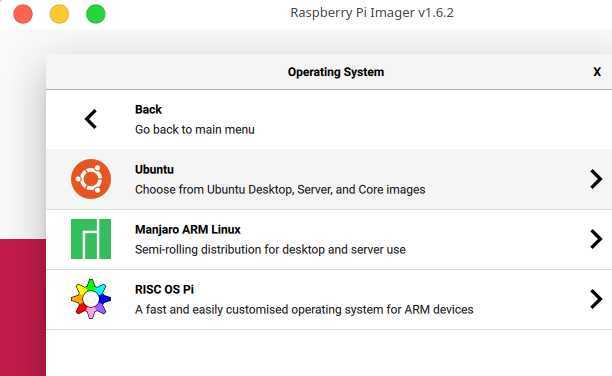
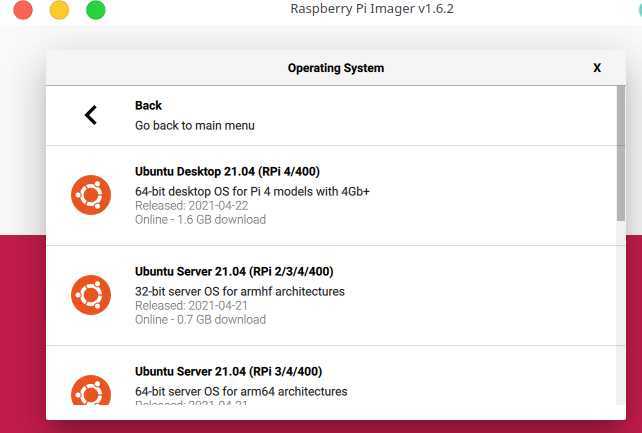
2.1.write the Ubuntu image to SD Card
download: ubuntu-22.04.1-preinstalled-server-arm64+raspi.img
The default username is “ ubuntu “. The default password is “ ubuntu “. When you first log in using these details, you will be asked to change the password to something more secure. Enter a secure alternative password to continue using the operating system.
2.2.update Ubuntu
sudo apt update
sudo apt upgrade

Running kernel seems to be up-to-date.

Failed to check for processor microcode upgrades.

No services need to be restarted.

No containers need to be restarted.

No user sessions are running outdated binaries.

No VM guests are running outdated hypervisor (qemu) binaries on this host.
All these messages came from needrestart application which purpose is: check which daemons need to be restarted after library upgrades.
This application have several modules. The processor microcode module supports only AMD and Intel processors. So it knows nothing about ARM in the RaspberryPi, so it shows the mentioned error message.
If you do not want to get such messages, then remove this application by:
sudo apt-get purge needrestart
Python3.10 installed by default.PIP3 not installed by default.
sudo apt-get install -y python3-pip
2.3.Set or Change Timezone
timedatectl list-timezones
sudo timedatectl set-timezone  America/Toronto
2.4.Install some optional apps
vim, htop, unzip, make and net-tools
sudo apt-get install vim
sudo apt-get install htop
sudo apt-get install net-tools
sudo apt-get install unzip
#install gcc, g++ and make
sudo apt install build-essential
2.5.Add user
groupadd nas
useradd -m -d /home/nas -g nas -s /bin/bash  nas
2.6.Disable IPv6
Step1: Check your IP address in Ubuntu
ip a
you should see an IPv6 address if it is enabled
Step2: To disable IPv6 you only have to input 3 commands:
sudo sysctl -w net.ipv6.conf.all.disable_ipv6=1
sudo sysctl -w net.ipv6.conf.default.disable_ipv6=1
sudo sysctl -w net.ipv6.conf.lo.disable_ipv6=1
Step3: check if it worked
ip a
this only temporarily disables IPv6.
Step4: Modify /etc/sysctl.conf
Add the following lines to the file:
net.ipv6.conf.all.disable_ipv6=1
net.ipv6.conf.default.disable_ipv6=1
net.ipv6.conf.lo.disable_ipv6=1
Step5: For the settings to take effect use:
sudo sysctl -p
Step6: create (with root privileges) the file /etc/rc.local and fill it with:
#!/bin/bash
# /etc/rc.local

/etc/sysctl.d
/etc/init.d/procps restart

exit 0
Step7: make the file executable
sudo chmod 755 /etc/rc.local
Step7: edit /etc/sysctl.conf
net.ipv6.conf.all.disable_ipv6 = 1
net.ipv6.conf.default.disable_ipv6 = 1
2.7.Change Host Name
1.Type the following command to edit /etc/hostname using text editor:
vi /etc/hostname
Delete the old name and setup new name.
2.Edit the /etc/hosts file:
vi /etc/hosts
add new line:
127.0.0.1 <your host name>
3.Reboot the system to changes take effect:
2.8.Install PWM fan control script
For ubuntu mate / ubuntun desktop / ubuntu server
Test this script based on the following OS:
- ubuntu-mate-20.04.1-desktop
- ubuntu server 21.04
- ubuntu-21.04-preinstalled-desktop-arm64+raspi
install
cd ~
sudo apt-get update
sudo apt-get upgrade

sudo apt-get install -y unzip make gcc python git wiringpi python3-pigpio python-setuptools python3-rpi.gpio
sudo apt-get install -y python3-distutils

#install pigpio library, also refer to http://abyz.me.uk/rpi/pigpio/download.html
wget https://github.com/joan2937/pigpio/archive/master.zip
unzip master.zip
cd pigpio-master
sudo make
sudo make install

cd ~
git clone https://github.com/geekworm-com/x-c1
cd x-c1
sudo chmod +x *.sh
sudo bash install-ubuntu.sh

echo "alias xoff='sudo /usr/local/bin/x-c1-softsd.sh'" >> ~/.bashrc
sudo reboot
Test safe shutdown
xoff
- Please run ‘xoff’ to shut down or press the on-board button switch to shut down. DON’T run the ‘shutdown’ linux command to shut down, otherwise the power of X-C1 will not be shut down.
- press button switch 1-2 seconds to reboot
- press button switch 3 seconds to safe shutdown,
- press 7-8 seconds to force shutdown.
uninstall
sudo ./uninstall-ubuntu.sh
2.9.Configure firewall
Step 1 – To view status of ufw, type:
sudo ufw status
Step 2 – Open SSH TCP port 22
sudo ufw allow ssh
Step 3 – Turn on firewall
sudo ufw enable
Step 4 – Open specific incoming connections/ports
sudo ufw allow 443/tcp comment 'accept HTTPS connections'
Step 5 – Verify status of UFW
sudo ufw status
Step 6 – Other command used to configure firewall
UFW delete rules
sudo ufw status numbered
sudo ufw delete 6
Reset the ufw
sudo ufw reset
Reload the ufw
sudo ufw reload
3.Configure External Storage
3.1.check hard drive health
smartmontools package is available in the repositories of all the major Linux distributions
sudo apt-get update && sudo apt-get install smartmontools
Checking if SMART is enabled on the device
sudo smartctl -i /dev/sda
Get location of the disk
sudo blkid
/dev/sdb1: UUID="c5fe051a-bfc3-40a3-81b3-c83045748e3e" BLOCK_SIZE="4096" TYPE="ext4" PARTUUID="114b305a-4af1-4ace-8853-9d1854a14d18"
/dev/mmcblk0p1: LABEL_FATBOOT="system-boot" LABEL="system-boot" UUID="D7E2-9D99" BLOCK_SIZE="512" TYPE="vfat" PARTUUID="b0a6845e-01"
/dev/mmcblk0p2: LABEL="writable" UUID="b09bb4c8-de4d-4ce6-a93f-30c4c9241a58" BLOCK_SIZE="4096" TYPE="ext4" PARTUUID="b0a6845e-02"
/dev/sda1: UUID="5bcd4331-7026-4851-9af3-aa92cf0de456" BLOCK_SIZE="4096" TYPE="ext4" PARTUUID="fa0c1cff-64ee-4203-b23e-0d9d1c36fcaf"
sudo smartctl -i /dev/sda
smartctl 7.2 2020-12-30 r5155 [aarch64-linux-5.15.0-1015-raspi] (local build)
Copyright (C) 2002-20, Bruce Allen, Christian Franke, www.smartmontools.org

=== START OF INFORMATION SECTION ===
Device Model:     WDC WD10SPCX-24HWST1
Serial Number:    WD-WX71A8592K04
Firmware Version: 80103060
User Capacity:    1,000,204,886,016 bytes [1.00 TB]
Sector Size:      512 bytes logical/physical
Device is:        Not in smartctl database [for details use: -P showall]
ATA Version is:   ATA/ATAPI-7 (minor revision not indicated)
Local Time is:    Sat Oct  1 15:19:56 2022 UTC
SMART support is: Available - device has SMART capability.
SMART support is: Enabled


sudo smartctl -i /dev/sdb
smartctl 7.2 2020-12-30 r5155 [aarch64-linux-5.15.0-1015-raspi] (local build)
Copyright (C) 2002-20, Bruce Allen, Christian Franke, www.smartmontools.org

=== START OF INFORMATION SECTION ===
Model Family:     Western Digital Blue Mobile
Device Model:     WDC WD10JPVX-08JC3T6
Serial Number:    WD-WX41A1717U04
LU WWN Device Id: 5 0014ee 6b2101739
Firmware Version: 08.01A08
User Capacity:    1,000,204,886,016 bytes [1.00 TB]
Sector Sizes:     512 bytes logical, 4096 bytes physical
Rotation Rate:    5400 rpm
Device is:        In smartctl database [for details use: -P show]
ATA Version is:   ACS-2 (minor revision not indicated)
SATA Version is:  SATA 3.0, 6.0 Gb/s (current: 6.0 Gb/s)
Local Time is:    Sat Oct  1 15:20:51 2022 UTC
SMART support is: Available - device has SMART capability.
SMART support is: Enabled
If SMART is disabled, run this command:
sudo smartctl -s on /dev/sda
To get all the available SMART information about a storage device
sudo smartctl -a /dev/sda

SMART Attributes Data Structure revision number: 16
Vendor Specific SMART Attributes with Thresholds:
ID# ATTRIBUTE_NAME          FLAG     VALUE WORST THRESH TYPE      UPDATED  WHEN_FAILED RAW_VALUE
  1 Raw_Read_Error_Rate     0x002f   200   200   051    Pre-fail  Always       -       12
  3 Spin_Up_Time            0x0027   190   183   021    Pre-fail  Always       -       1475
  4 Start_Stop_Count        0x0032   098   098   000    Old_age   Always       -       2229
  5 Reallocated_Sector_Ct   0x0033   185   185   140    Pre-fail  Always       -       646
  7 Seek_Error_Rate         0x002f   200   200   051    Pre-fail  Always       -       0
  9 Power_On_Hours          0x0032   098   098   000    Old_age   Always       -       2093
 10 Spin_Retry_Count        0x0032   100   100   000    Old_age   Always       -       0
 11 Calibration_Retry_Count 0x0032   100   100   000    Old_age   Always       -       0
 12 Power_Cycle_Count       0x0032   099   099   000    Old_age   Always       -       1168
192 Power-Off_Retract_Count 0x0032   200   200   000    Old_age   Always       -       72
193 Load_Cycle_Count        0x0032   199   199   000    Old_age   Always       -       5864
194 Temperature_Celsius     0x0022   115   095   000    Old_age   Always       -       32
196 Reallocated_Event_Count 0x0032   138   138   000    Old_age   Always       -       62
197 Current_Pending_Sector  0x0032   200   200   000    Old_age   Always       -       0
198 Offline_Uncorrectable   0x0030   100   253   000    Old_age   Offline      -       0
199 UDMA_CRC_Error_Count    0x0032   200   200   000    Old_age   Always       -       120
200 Multi_Zone_Error_Rate   0x0008   200   200   000    Old_age   Offline      -       0
240 Head_Flying_Hours       0x0032   099   099   000    Old_age   Always       -       1395

Read SMART Error Log failed: scsi error aborted command

Read SMART Self-test Log failed: scsi error aborted command

Read SMART Selective Self-test Log failed: scsi error aborted command


sudo smartctl -a /dev/sdb
SMART Attributes Data Structure revision number: 16
Vendor Specific SMART Attributes with Thresholds:
ID# ATTRIBUTE_NAME          FLAG     VALUE WORST THRESH TYPE      UPDATED  WHEN_FAILED RAW_VALUE
  1 Raw_Read_Error_Rate     0x002f   200   200   051    Pre-fail  Always       -       0
  3 Spin_Up_Time            0x0027   187   183   021    Pre-fail  Always       -       1641
  4 Start_Stop_Count        0x0032   001   001   000    Old_age   Always       -       118119
  5 Reallocated_Sector_Ct   0x0033   200   200   140    Pre-fail  Always       -       0
  7 Seek_Error_Rate         0x002f   200   200   051    Pre-fail  Always       -       0
  9 Power_On_Hours          0x0032   094   094   000    Old_age   Always       -       4890
 10 Spin_Retry_Count        0x0032   100   100   000    Old_age   Always       -       0
 11 Calibration_Retry_Count 0x0032   100   100   000    Old_age   Always       -       0
 12 Power_Cycle_Count       0x0032   098   098   000    Old_age   Always       -       2648
192 Power-Off_Retract_Count 0x0032   199   199   000    Old_age   Always       -       876
193 Load_Cycle_Count        0x0032   147   147   000    Old_age   Always       -       159557
194 Temperature_Celsius     0x0022   111   094   000    Old_age   Always       -       36
196 Reallocated_Event_Count 0x0032   200   200   000    Old_age   Always       -       0
197 Current_Pending_Sector  0x0032   200   200   000    Old_age   Always       -       0
198 Offline_Uncorrectable   0x0030   100   253   000    Old_age   Offline      -       0
199 UDMA_CRC_Error_Count    0x0032   200   200   000    Old_age   Always       -       0
200 Multi_Zone_Error_Rate   0x0008   100   253   000    Old_age   Offline      -       0
240 Head_Flying_Hours       0x0032   098   098   000    Old_age   Always       -       2173

SMART Error Log Version: 1
No Errors Logged

SMART Self-test log structure revision number 1
Num  Test_Description    Status                  Remaining  LifeTime(hours)  LBA_of_first_error
# 1  Short offline       Interrupted (host reset)      90%         3         -

SMART Selective self-test log data structure revision number 1
 SPAN  MIN_LBA  MAX_LBA  CURRENT_TEST_STATUS
    1        0        0  Not_testing
    2        0        0  Not_testing
    3        0        0  Not_testing
    4        0        0  Not_testing
    5        0        0  Not_testing
Selective self-test flags (0x0):
  After scanning selected spans, do NOT read-scan remainder of disk.
If Selective self-test is pending on power-up, resume after 0 minute delay.
Very important parameters to check are, among the others, “Reallocated_Sector_Ct” and “Current_Pending_Sector”. In both cases if the RAW_VALUE is something other than 0, we should be very careful and start to backup data on the hard drive. The Reallocated_Sector_Ct is the count of sectors on the block device which cannot be used correctly.
Create Partition
fdisk /dev/sda
create ext4 filesystem
mkfs.ext4 /dev/sda1
3.2.Mount the HDD
Make a target directory
mkdir -p /mnt/hdd1
mkdir -p /mnt/hdd2
mount /dev/sda1 /mnt/hdd1
mount /dev/sdb1 /mnt/hdd2
vi /etc/fstab

/dev/sda1 /mnt/hdd1 ext4 defaults 0 0
/dev/sdb1 /mnt/hdd2 ext4 defaults 0 0
Reboot and verify the drive is being automatically mounted.
sudo reboot
ls /mnt/hdd1
4.Installing prerequisites
4.1.Install Django
sudo apt-get install libffi-dev
sudo apt-get install -y libmysqlclient-dev
sudo apt-get install -y memcached libmemcached-dev
git clone https://gitcode.net/imagine-miracle/cffi.git
cd cffi
ls
cffi-1.14.0.tar.gz cffi-1.15.0.tar.gz README.md

tar -xf cffi-1.14.0.tar.gz
tar -xf cffi-1.15.0.tar.gz
ls
cffi-1.14.0 cffi-1.14.0.tar.gz cffi-1.15.0 cffi-1.15.0.tar.gz README.md


cd cffi-1.14.0/
~/cffi/cffi-1.14.0# ls
AUTHORS cffi demo LICENSE PKG-INFO setup_base.py setup.py
c cffi.egg-info doc MANIFEST.in README.md setup.cfg testing

~/cffi/cffi-1.14.0# cp ../cffi-1.15.0/c/_cffi_backend.c ./c/

sudo python3 setup.py install
Finished processing dependencies for cffi==1.14.0
sudo pip3 install --timeout=3600 django==3.2.* Pillow pylibmc captcha jinja2 sqlalchemy==1.4.3 \
    django-pylibmc django-simple-captcha python3-ldap mysqlclient pycryptodome==3.12.0 cffi==1.14.0 lxml


Successfully installed captcha-0.4 django-ranged-response-0.2.0 django-simple-captcha-0.5.17 sqlalchemy-1.3.8
4.2.Install MySQL
sudo apt-get update
sudo apt-get install mysql-server
sudo systemctl start mysql.service

netstat -tag | grep mysql
sudo systemctl status mysql.service
Set root password
sudo mysql
mysql> ALTER USER 'root'@'localhost' IDENTIFIED WITH mysql_native_password BY '<root_password>';
Configure MySQL
sudo mysql_secure_installation

Would you like to setup VALIDATE PASSWORD component? Yes
Change the password for root ? No
Remove anonymous users? Y
Disallow root login remotely? No
Remove test database and access to it? Y
Reload privilege tables now? Y
add the following to your MySQL file:
/etc/mysql/my.cnf
[mysqld]
default_authentication_plugin=mysql_native_password
Restart MySQL server
service mysql stop
service mysql start
4.3.Install Java Running environment
sudo apt-get install openjdk-8-jre -y
sudo ln -sf /usr/lib/jvm/java-8-openjdk-amd64/jre/bin/java /usr/bin/
4.4.Install poppler-utils
Require for PDF Full text search.
sudo apt-get install poppler-utils -y
5.Installation
5.1.Creating the program directory
The standard directory for Seafile’s program files is /opt/seafile. Create this directory and change into it:
mkdir /opt/seafile
cd /opt/seafile
5.2.Creating user seafile
It is good practice not to run applications as root.
Create a new user and follow the instructions on the screen:
sudo adduser seafile
Change ownership of the created directory to the new user:
chown -R seafile: /opt/seafile
All the following steps are done as user seafile.
Change to user seafile:
su seafile
5.3.Download and uncompress the installation package
cd /opt/seafile

wget https://s3.eu-central-1.amazonaws.com/download.seadrive.org/seafile-server_9.0.9_x86-64.tar.gz

tar xf seafile-server_9.0.9_x86-64.tar.gz
tree -L 2
.
├── seafile-server-9.0.9
│   ├── check_init_admin.py
│   ├── reset-admin.sh
│   ├── runtime
│   ├── seaf-fsck.sh
│   ├── seaf-fuse.sh
│   ├── seaf-gc.sh
│   ├── seafile
│   ├── seafile.sh
│   ├── seahub
│   ├── seahub.sh
│   ├── setup-seafile-mysql.py
│   ├── setup-seafile-mysql.sh
│   ├── setup-seafile.sh
│   ├── sql
│   └── upgrade
└── seafile-server_9.0.9_x86-64.tar.gz
5.4.Set up seafile
“setup-seafile-mysql.sh” creates the required directories and extracts all files in the right place. It can also create a MySQL user and the three databases that Seafile’s components require :
- ccnet server
- seafile server
- seahub
Run the script as user seafile:
cd seafile-server-9.0.9/
pip3 install PyMySQL[rsa]
pip3 install mysql-connector-python
./setup-seafile-mysql.sh
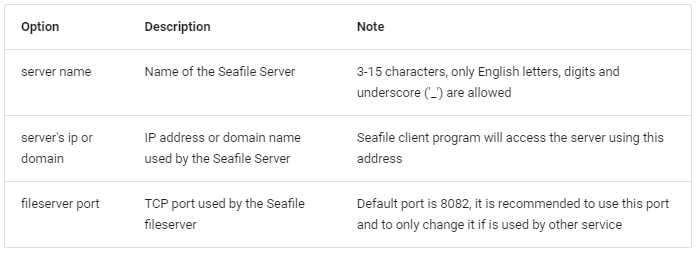
Configure your Seafile Server by specifying the following three parameters:
Checking python on this machine ...

-----------------------------------------------------------------
This script will guide you to setup your seafile server using MySQL.
Make sure you have read seafile server manual at

        https://download.seafile.com/published/seafile-manual/home.md

Press ENTER to continue
-----------------------------------------------------------------

What is the name of the server? It will be displayed on the client.
3 - 15 letters or digits
[ server name ] NASPi

What is the ip or domain of the server?
For example: www.mycompany.com, 192.168.1.101
[ This server's ip or domain ] 192.168.1.54

Which port do you want to use for the seafile fileserver?
[ default "8082" ]

-------------------------------------------------------
Please choose a way to initialize seafile databases:
-------------------------------------------------------

[1] Create new ccnet/seafile/seahub databases
[2] Use existing ccnet/seafile/seahub databases

[ 1 or 2 ] 1

What is the host of mysql server?
[ default "localhost" ]

What is the port of mysql server?
[ default "3306" ]

What is the password of the mysql root user?
[ root password ]

verifying password of user root ...  done

Enter the name for mysql user of seafile. It would be created if not exists.
[ default "seafile" ]

Enter the password for mysql user "seafile":
[ password for seafile ]

Enter the database name for ccnet-server:
[ default "ccnet-db" ]

Enter the database name for seafile-server:
[ default "seafile-db" ]

Enter the database name for seahub:
[ default "seahub-db" ]

---------------------------------
This is your configuration
---------------------------------

    server name:            NASPi
    server ip/domain:       192.168.1.54

    seafile data dir:       /home/seafile/seafile-data
    fileserver port:        8082

    database:               create new
    ccnet database:         ccnet-db
    seafile database:       seafile-db
    seahub database:        seahub-db
    database user:          seafile


---------------------------------
Press ENTER to continue, or Ctrl-C to abort
---------------------------------
If the setup is successful, you see the following output:
-----------------------------------------------------------------
Your seafile server configuration has been finished successfully.
-----------------------------------------------------------------

run seafile server:     ./seafile.sh { start | stop | restart }
run seahub  server:     ./seahub.sh  { start <port> | stop | restart <port> }

-----------------------------------------------------------------
If you are behind a firewall, remember to allow input/output of these tcp ports:
-----------------------------------------------------------------

port of seafile fileserver:   8082
port of seahub:               8000
The directory layout then looks as follows:
tree /opt/seafile -L 2
/opt/seafile
├── ccnet
├── conf
│   ├── ccnet.conf
│   ├── gunicorn.conf.py
│   ├── seafdav.conf
│   ├── seafile.conf
│   └── seahub_settings.py
├── seafile-data
│   └── library-template
├── seafile-server-9.0.9
│   ├── check_init_admin.py
│   ├── reset-admin.sh
│   ├── runtime
│   ├── seaf-fsck.sh
│   ├── seaf-fuse.sh
│   ├── seaf-gc.sh
│   ├── seafile
│   ├── seafile.sh
│   ├── seahub
│   ├── seahub.sh
│   ├── setup-seafile-mysql.py
│   ├── setup-seafile-mysql.sh
│   ├── setup-seafile.sh
│   ├── sql
│   └── upgrade
├── seafile-server-latest -> seafile-server-9.0.9
└── seahub-data
    └── avatars -> ../../../seahub-data/avatars
The folder seafile-server-latest is a symbolic link to the current Seafile Server folder. When later you upgrade to a new version, the upgrade scripts update this link to point to the latest Seafile Server folder.
5.5.Tweaking conf file
Seafile’s config files as created by the setup script are prepared for Seafile running behind a reverse proxy.
To access Seafile’s web interface and to create working sharing links without a reverse proxy, you need to modify two configuration files in /opt/seafile/conf:
seahub_settings.py (if you use 9.0.x): Add port 8000 to the SERVICE_URL (i.e., SERVICE_URL = ‘http://1.2.3.4:8000/’).
gunicorn.conf.py: Change the bind to “0.0.0.0:8000” (i.e., bind = “0.0.0.0:8000”)
5.6.Starting Seafile Server
Run the following commands in /opt/seafile-server-latest:
./seafile.sh start # starts seaf-server
./seahub.sh start  # starts seahub
6.Seafile configuration
By now, the host in can only pass through IP:Port to access web pages , you cannot upload or download files.
We have to do more configurations.
6.1.MySQL Configuration
sudo vi /etc/mysql/mysql.conf.d/mysqld.cnf
Comment out these two lines:
bind-address            = 127.0.0.1
mysqlx-bind-address     = 127.0.0.1
restart mysql.service
sudo systemctl status mysql.service
6.2.MySQL seafile User Settings
sudo mysql -u root -p
use mysql;
select user, host from user;
users can only login to localhost to access the database, that’s why you can’t upload and download files.
update user set host='%' where user='seafile';
flush privileges;
Now, seafile user can connect to the database with domain name or IP address.
Change seafile authentication.
ALTER USER 'seafile'@'%' IDENTIFIED WITH mysql_native_password by '<user password>';
flush privileges;
Then user’s authentication plug-in is mysql_native_password.
6.3.Databases configuration
ccnet, seafile and seahub databases can access from donmain name or IP address from Internet.
GRANT ALL PRIVILEGES ON `ccnet_db`.* to `seafile`@'%';
GRANT ALL PRIVILEGES ON `seafile_db`.* to `seafile`@'%';
GRANT ALL PRIVILEGES ON `seahub_db`.* to `seafile`@'%';
flush privileges;
restart mysql.service
sudo systemctl restart mysql.service
7.Enabling HTTPS with Nginx
HTTPS requires a SSL certificate from a Certificate Authority (CA). Unless you already have a SSL certificate, we recommend that you get your SSL certificate from Let’s Encrypt using Certbot.
A second requirement is a reverse proxy supporting SSL. Nginx, a popular and resource-friendly web server and reverse proxy, is a good option. Nginx’s documentation is available at http://nginx.org/en/docs/.
7.1.Install Nginx From Ubuntu Repositories
sudo apt-get install nginx

nginx -v
nginx version: nginx/1.18.0 (Ubuntu)


sudo systemctl start nginx
sudo systemctl enable nginx
sudo systemctl status nginx
delete the default Nginx server block
cd sites-available
mv default /home/<your_user_name>/sites-available.default

cd sites-enabled
mv default /home/<your_user_name>/sites-enabled.default
7.2.Allow Nginx Traffic
7.3.Prepare Nginx
Create a configuration file for seafile in /etc/nginx/sites-available/:
touch /etc/nginx/sites-available/seafile.conf
Create a symbolic link:
ln -s /etc/nginx/sites-available/seafile.conf /etc/nginx/sites-enabled/seafile.conf
7.4.Configuring Nginx
Copy the following sample Nginx config file into the just created seafile.conf and modify the content to fit your needs:
log_format seafileformat 'http_x_forwarded_forremote_addr [time_local] "request" statusbody_bytes_sent "http_referer" "http_user_agent" upstream_response_time';

server {
    listen 80;
    server_name <enter your domain here>;

    proxy_set_header X-Forwarded-Forremote_addr;

    location / {
         proxy_pass         http://127.0.0.1:8000;
         proxy_set_header   Host host;
         proxy_set_header   X-Real-IPremote_addr;
         proxy_set_header   X-Forwarded-For proxy_add_x_forwarded_for;
         proxy_set_header   X-Forwarded-Hostserver_name;
         proxy_read_timeout  1200s;

         # used for view/edit office file via Office Online Server
         client_max_body_size 200M;

         access_log      /var/log/nginx/seahub.access.log seafileformat;
         error_log       /var/log/nginx/seahub.error.log;
    }

    location /seafhttp {
        rewrite ^/seafhttp(.*)1 break;
        proxy_pass http://127.0.0.1:8082;
        client_max_body_size 0;
        proxy_set_header   X-Forwarded-For $proxy_add_x_forwarded_for;

        proxy_connect_timeout  36000s;
        proxy_read_timeout  36000s;
        proxy_send_timeout  36000s;

        send_timeout  36000s;

        access_log      /var/log/nginx/seafhttp.access.log seafileformat;
        error_log       /var/log/nginx/seafhttp.error.log;
    }
    location /media {
        root /opt/seafile/seafile-server-latest/seahub;
    }
}
The following options must be modified in the CONF file:
- Server name (server_name)
Optional customizable options in the seafile.conf are:
- Server listening port (listen) – if Seafile server should be available on a non-standard port
- Proxy pass for location / – if Seahub is configured to start on a different port than 8000
- Proxy pass for location /seafhttp – if seaf-server is configured to start on a different port than 8082
- Maximum allowed size of the client request body (client_max_body_size)
- The default value for client_max_body_size is 1M. Uploading larger files will result in an error message HTTP error code 413 (“Request Entity Too Large”). It is recommended to syncronize the value of client_max_body_size with the parameter max_upload_size in section [fileserver] of $installation_dir/conf/seafile.conf. Optionally, the value can also be set to 0 to disable this feature. Client uploads are only partly effected by this limit. With a limit of 100 MiB they can safely upload files of any size.
Example: in conf/seafile.conf
max_upload_size=200 # Set maximum download directory size to 200M
Set the default quota for all users:
Example: in conf/seafile.conf
[quota]
# default user quota in GB, integer only
default = 2
7.5.Getting a Let’s Encrypt certificate
Getting a Let’s Encrypt certificate is straightforward thanks to Certbot. Certbot is a free, open source software tool for requesting, receiving, and renewing Let’s Encrypt certificates.
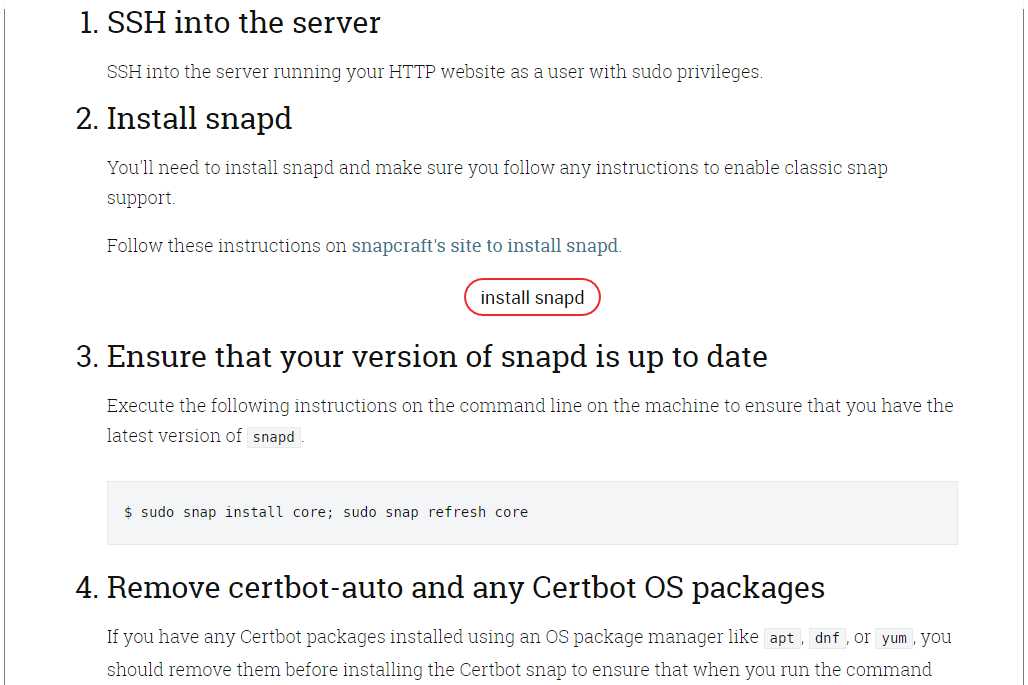
Firstly, go to the Certbot website and choose your webserver and OS.
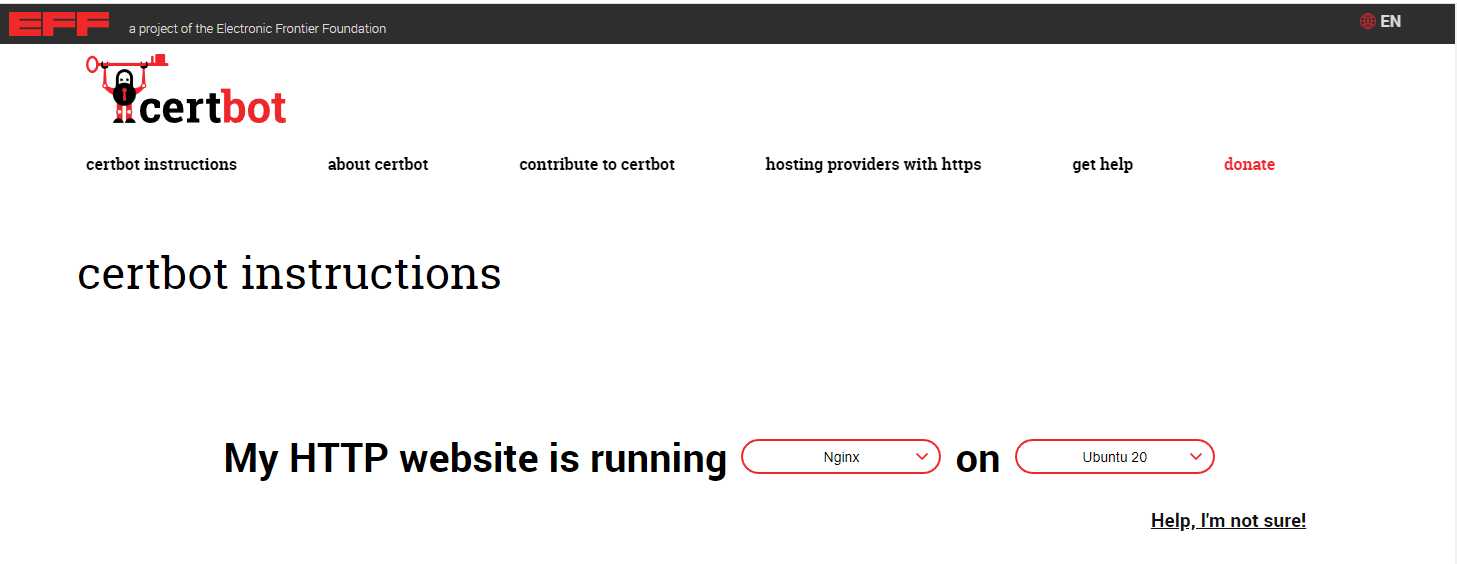
Secondly, follow the detailed instructions then shown.
7.6.Modifying Nginx configuration file
log_format seafileformat 'http_x_forwarded_forremote_addr [time_local] "request" statusbody_bytes_sent "http_referer" "http_user_agent" upstream_response_time';

server {
    listen       80;
    server_name  seafile.example.com;
    rewrite ^ https://http_hostrequest_uri? permanent;    # Forced redirect from HTTP to HTTPS

    server_tokens off;      # Prevents the Nginx version from being displayed in the HTTP response header
}

server {
    listen 443;
    ssl on;
    ssl_certificate /etc/letsencrypt/live/seafile.example.com/fullchain.pem;    # Path to your fullchain.pem
    ssl_certificate_key /etc/letsencrypt/live/seafile.example.com/privkey.pem;  # Path to your privkey.pem
    server_name seafile.example.com;
    server_tokens off;

    location / {
        proxy_pass         http://127.0.0.1:8000;
        proxy_set_header   Hosthost;
        proxy_set_header   X-Real-IP remote_addr;
        proxy_set_header   X-Forwarded-Forproxy_add_x_forwarded_for;
        proxy_set_header   X-Forwarded-Host $server_name;
        proxy_read_timeout 1200s;

        proxy_set_header   X-Forwarded-Proto https;

... # No changes beyond this point compared to the Nginx configuration without HTTPS
Finally, make sure your seafile.conf does not contain syntax errors and restart Nginx for the configuration changes to take effect:
nginx -t
nginx -s reload
7.7.Enabling HTTP Strict Transport Security
Enable HTTP Strict Transport Security (HSTS) to prevent man-in-the-middle-attacks by adding this directive:
add_header Strict-Transport-Security "max-age=31536000; includeSubDomains" always;
HSTS instructs web browsers to automatically use HTTPS. That means, after the first visit of the HTTPS version of Seahub, the browser will only use https to access the site.
7.8.Using Perfect Forward Secrecy
Enable Diffie-Hellman (DH) key-exchange. Generate DH parameters and write them in a .pem file using the following command:
openssl dhparam 2048 > /etc/nginx/dhparam.pem # Generates DH parameter of length 2048 bits
The generation of the the DH parameters may take some time depending on the server’s processing power.
Add the following directive in the HTTPS server block:
ssl_dhparam /etc/nginx/dhparam.pem;
7.9.Modifying SERVICE_URL
In System Admininstration > Settings
SERVICE_URL https://your_domain.com:8443
FILE_SERVER_ROOT https://your_domain.com:8443/seafhttp
cd /tmp/seahub_cache
rm *
restart seafile and seahub
7.10.Large file uploads
Tip for uploading very large files (> 4GB): By default Nginx will buffer large request body in temp file. After the body is completely received, Nginx will send the body to the upstream server (seaf-server in our case). But it seems when file size is very large, the buffering mechanism dosen’t work well. It may stop proxying the body in the middle. So if you want to support file upload larger for 4GB, we suggest you install Nginx version >= 1.8.0 and add the following options to Nginx config file:
location /seafhttp {
        ... ...
        proxy_request_buffering off;
    }
If you have WebDAV enabled it is recommended to add the same:
location /seafdav {
        ... ...
        proxy_request_buffering off;
    }
7.11.Change storage path
./seafile.sh stop
./seahub.sh stop
rm -r /opt/seafile/seafile-data
ln -s /mnt/hdd2/seafile /opt/seafile/seafile-data
./seafile.sh start
./seahub.sh start
8.Installation Issues
Issue 1:c/_cffi_backend.c Source file error
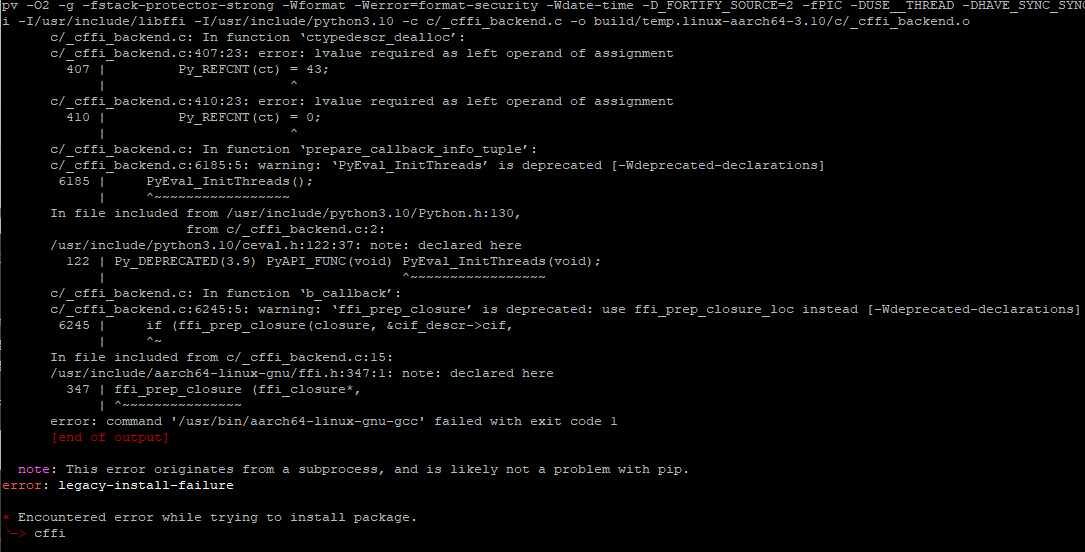
Install cffi 1.14.0 and cffi 1.15.0 with source code.
We will use version 15 source code to rewrite version 14’s.
git clone https://gitcode.net/imagine-miracle/cffi.git
cd cffi
ls
cffi-1.14.0.tar.gz cffi-1.15.0.tar.gz README.md

tar -xf cffi-1.14.0.tar.gz
tar -xf cffi-1.15.0.tar.gz
ls
cffi-1.14.0 cffi-1.14.0.tar.gz cffi-1.15.0 cffi-1.15.0.tar.gz README.md


cd cffi-1.14.0/
cffi-1.14.0$ ls
AUTHORS cffi demo LICENSE PKG-INFO setup_base.py setup.py
c cffi.egg-info doc MANIFEST.in README.md setup.cfg testing

sudo python3 setup.py install
aarch64-linux-gnu-gcc -Wno-unused-result -Wsign-compare -DNDEBUG -g -fwrapv -O2 -Wall -g -fstack-protector-strong -Wformat -Werror=format-security -g -fwrapv -O2 -g -fstack-protector-strong -Wformat -Werror=format-security -Wdate-time -D_FORTIFY_SOURCE=2 -fPIC -DUSE__THREAD -DHAVE_SYNC_SYNCHRONIZE -I/usr/include/ffi -I/usr/include/libffi -I/usr/include/python3.10 -c c/_cffi_backend.c -o build/temp.linux-aarch64-3.10/c/_cffi_backend.o
c/_cffi_backend.c: In function ‘ctypedescr_dealloc’:
c/_cffi_backend.c:407:23: error: lvalue required as left operand of assignment
  407 |         Py_REFCNT(ct) = 43;
      |                       ^
c/_cffi_backend.c:410:23: error: lvalue required as left operand of assignment
  410 |         Py_REFCNT(ct) = 0;
      |                       ^
c/_cffi_backend.c: In function ‘prepare_callback_info_tuple’:
c/_cffi_backend.c:6185:5: warning: ‘PyEval_InitThreads’ is deprecated [-Wdeprecated-declarations]
 6185 |     PyEval_InitThreads();
      |     ^~~~~~~~~~~~~~~~~~
In file included from /usr/include/python3.10/Python.h:130,
                 from c/_cffi_backend.c:2:
/usr/include/python3.10/ceval.h:122:37: note: declared here
  122 | Py_DEPRECATED(3.9) PyAPI_FUNC(void) PyEval_InitThreads(void);
      |                                     ^~~~~~~~~~~~~~~~~~
c/_cffi_backend.c: In function ‘b_callback’:
c/_cffi_backend.c:6245:5: warning: ‘ffi_prep_closure’ is deprecated: use ffi_prep_closure_loc instead [-Wdeprecated-declarations]
 6245 |     if (ffi_prep_closure(closure, &cif_descr->cif,
      |     ^~
In file included from c/_cffi_backend.c:15:
/usr/include/aarch64-linux-gnu/ffi.h:347:1: note: declared here
  347 | ffi_prep_closure (ffi_closure*,
      | ^~~~~~~~~~~~~~~~
error: command '/usr/bin/aarch64-linux-gnu-gcc' failed with exit code 1
Here you can see the error. It is the same as reporting error during installation. It’s cause by c/cffi_backend.c file and it had been fixed in version 15.
ubuntu@ubuntu:~/cffi/cffi-1.14.0$ cp ../cffi-1.15.0/c/_cffi_backend.c ./c/

sudo python3 setup.py install

Finished processing dependencies for cffi==1.14.0
Issue 2: Error: Failed to connect to mysql database ccnet-db
Error: Failed to connect to mysql database ccnet-db: ‘cryptography’ package is required for sha256_password or caching_sha2_password auth methods
Per MySQL 8 documentation https://dev.mysql.com/doc/refman/8.0/en/upgrading-from-previous-series.html#upgrade-caching-sha2-password, easiest way to fix this is to add the following to your MySQL file -> restart MySQL server.
[mysqld]
#add the following file to your MySQLd file
    default_authentication_plugin=mysql_native_password
Issue 3: ModuleNotFoundError: No module named ‘seaserv’
./seafile.sh start

Starting seafile server, please wait ...
** Message: 20:12:46.683: seafile-controller.c(621): No seafevents.

Seafile server started

Done.
seafile@NASPi:/opt/seafile/seafile-server-9.0.2$ ./seahub.sh start

LC_ALL is not set in ENV, set to en_US.UTF-8
Starting seahub at port 8000 ...
Traceback (most recent call last):
  File "/opt/seafile/seafile-server-9.0.2/check_init_admin.py", line 19, in <module>
    from seaserv import ccnet_api
ModuleNotFoundError: No module named 'seaserv'
Cause:
python3 used as the path in script.
Solution:
cd <seafile install path>/seafile/lib
mv python3.6 python3
Issue 4: Error:Seahub failed to start. cannot import name ‘mysql’
./seahub.sh start

LC_ALL is not set in ENV, set to en_US.UTF-8
Starting seahub at port 8000 ...

----------------------------------------
It's the first time you start the seafile server. Now let's create the admin account
----------------------------------------

What is the email for the admin account?
[ admin email ]
What is the email for the admin account?
[ admin email ] ted.liu.2030@gmail.com

What is the password for the admin account?
[ admin password ]

Enter the password again:
[ admin password again ]


----------------------------------------
Successfully created seafile admin
----------------------------------------


Error:Seahub failed to start.
Please try to run "./seahub.sh start" again
Debug:
./seahub.sh start-fastcgi

LC_ALL is not set in ENV, set to en_US.UTF-8
Starting seahub (fastcgi) at 127.0.0.1:8000 ...
Traceback (most recent call last):
  File "/opt/seafile/seafile-server-9.0.2/seahub/thirdpart/MySQLdb/__init__.py", line 18, in <module>
    from . import _mysql
ImportError: cannot import name '_mysql' from partially initialized module 'MySQLdb' (most likely due to a circular import) (/opt/seafile/seafile-server-9.0.2/seahub/thirdpart/MySQLdb/__init__.py)

During handling of the above exception, another exception occurred:

Traceback (most recent call last):
  File "/opt/seafile/seafile-server-9.0.2/seahub/manage.py", line 10, in <module>
    execute_from_command_line(sys.argv)
  File "/opt/seafile/seafile-server-9.0.2/seahub/thirdpart/django/core/management/__init__.py", line 419, in execute_from_command_line
    utility.execute()
  File "/opt/seafile/seafile-server-9.0.2/seahub/thirdpart/django/core/management/__init__.py", line 395, in execute
    django.setup()
  File "/opt/seafile/seafile-server-9.0.2/seahub/thirdpart/django/__init__.py", line 24, in setup
    apps.populate(settings.INSTALLED_APPS)
  File "/opt/seafile/seafile-server-9.0.2/seahub/thirdpart/django/apps/registry.py", line 114, in populate
    app_config.import_models()
  File "/opt/seafile/seafile-server-9.0.2/seahub/thirdpart/django/apps/config.py", line 301, in import_models
    self.models_module = import_module(models_module_name)
  File "/usr/lib/python3.10/importlib/__init__.py", line 126, in import_module
    return _bootstrap._gcd_import(name[level:], package, level)
  File "<frozen importlib._bootstrap>", line 1050, in _gcd_import
  File "<frozen importlib._bootstrap>", line 1027, in _find_and_load
  File "<frozen importlib._bootstrap>", line 1006, in _find_and_load_unlocked
  File "<frozen importlib._bootstrap>", line 688, in _load_unlocked
  File "<frozen importlib._bootstrap_external>", line 883, in exec_module
  File "<frozen importlib._bootstrap>", line 241, in _call_with_frames_removed
  File "/opt/seafile/seafile-server-9.0.2/seahub/thirdpart/django/contrib/sessions/models.py", line 1, in <module>
    from django.contrib.sessions.base_session import (
  File "/opt/seafile/seafile-server-9.0.2/seahub/thirdpart/django/contrib/sessions/base_session.py", line 26, in <module>
    class AbstractBaseSession(models.Model):
  File "/opt/seafile/seafile-server-9.0.2/seahub/thirdpart/django/db/models/base.py", line 122, in __new__
    new_class.add_to_class('_meta', Options(meta, app_label))
  File "/opt/seafile/seafile-server-9.0.2/seahub/thirdpart/django/db/models/base.py", line 326, in add_to_class
    value.contribute_to_class(cls, name)
  File "/opt/seafile/seafile-server-9.0.2/seahub/thirdpart/django/db/models/options.py", line 207, in contribute_to_class
    self.db_table = truncate_name(self.db_table, connection.ops.max_name_length())
  File "/opt/seafile/seafile-server-9.0.2/seahub/thirdpart/django/utils/connection.py", line 15, in __getattr__
    return getattr(self._connections[self._alias], item)
  File "/opt/seafile/seafile-server-9.0.2/seahub/thirdpart/django/utils/connection.py", line 62, in __getitem__
    conn = self.create_connection(alias)
  File "/opt/seafile/seafile-server-9.0.2/seahub/thirdpart/django/db/utils.py", line 204, in create_connection
    backend = load_backend(db['ENGINE'])
  File "/opt/seafile/seafile-server-9.0.2/seahub/thirdpart/django/db/utils.py", line 111, in load_backend
    return import_module('%s.base' % backend_name)
  File "/usr/lib/python3.10/importlib/__init__.py", line 126, in import_module
    return _bootstrap._gcd_import(name[level:], package, level)
  File "/opt/seafile/seafile-server-9.0.2/seahub/thirdpart/django/db/backends/mysql/base.py", line 15, in <module>
    import MySQLdb as Database
  File "/opt/seafile/seafile-server-9.0.2/seahub/thirdpart/MySQLdb/__init__.py", line 24, in <module>
    version_info, _mysql.version_info, _mysql.__file__
NameError: name '_mysql' is not defined
Error:Seahub failed to start.
Solution:
cd /opt/seafile/seafile-server-9.0.2/seahub/thirdpart
mv PIL PIL.bak
/opt/seafile/seafile-server-latest$ ./seahub.sh start

LC_ALL is not set in ENV, set to en_US.UTF-8
Starting seahub at port 8000 ...

Seahub is started

Done.
Issue 5: Unknown command: ‘runfcgi’
 ./seahub.sh start-fastcgi

LC_ALL is not set in ENV, set to en_US.UTF-8
Starting seahub (fastcgi) at 127.0.0.1:8000 ...
Unknown command: 'runfcgi'
Type 'manage.py help' for usage.
Error:Seahub failed to start.
Seahub now needs to be started with ./seahub.sh start
And the proxy has to pass http instead of fastcgi requests.
Issue 6: seafile CSRF verification failed.
location / {
proxy_pass          http://127.0.0.1:8000;
proxy_set_header    Host $host:CUSTOMPORT;
Replace CUSTOMPORT with the port you’re running your nginx on.
Issue 7: File Upload Failed – Network Error
Login to your Seafile web UI, click on your avatar, got ot “System Admin” > Settings > FILE_SERVER_ROOT > and here you should put your seafile URL or IP address like this:
“hxxp://{YOUR_SERVER_URL}/seafhttp”
For exmple, my server URL is “seafile-test.com” so I put
https://seafile-test.com/seafhttp
Issue 8: Upload slow
Tested upload speed about 20Mbps
1.Test Network speed
iperf is one of the useful utilities to test point-to-point bandwidth.
iperf is a tool for active measurements of the maximum achievable bandwidth on IP networks. It supports tuning of various parameters related to timing, protocols, and buffers. For each test it reports the measured throughput / bitrate, loss, and other parameters.
For more information see: https://software.es.net/iperf
Source code and issue tracker: https://github.com/esnet/iperf
Discussion forums: https://github.com/esnet/iperf/discussions
Downloads of iperf3 are available at: https://downloads.es.net/pub/iperf/
wget https://downloads.es.net/pub/iperf/iperf-3.12.tar.gz
tar -zxvf iperf-3.12.tar.gz

cd iperf-3.12
./configure -prefix /usr; make; make install
How to use iPerf3 to measure throughput?
First,Type the following command:
iperf3 -s -p 7000
This command tells this instance of iPerf3 that it will be functioning as a server — or waiting to receive data. By default, the iPerf3 server will listen on port 5001. You may need to know this to configure your firewall to map traffic for the iPerf3 port to your iPerf3 server.
Second, Type the following command on client server:
iperf3 -c 192.168.1.100 -p 7000
The -c tells the iPerf3 instance to function as a client station.
By default, the benchmark will run for 20 seconds. Then, it will present the average throughput for the run.
2.Test Disk read speed
“hdparm” is a Linux command-line tool that can be used to derive a sequential read speed of a storage device.
Step 1: Install hdparm
#CentOS, RHEL distributions:
sudo yum install hdparm


#Mint, Ubuntu, Debian:
apt-get install hdparm
Step 2: Run hdparm
hdparm -Tt /dev/sda

/dev/sda:
 Timing cached reads:   1554 MB in  2.00 seconds = 778.44 MB/sec
 Timing buffered disk reads: 188 MB in  3.06 seconds =  61.51 MB/sec


hdparm -Tt /dev/sdb

/dev/sdb:
 Timing cached reads:   1562 MB in  2.00 seconds = 782.02 MB/sec
 Timing buffered disk reads: 252 MB in  3.16 seconds =  79.84 MB/sec
2.Test Disk write speed
dd if=/dev/zero of=/mnt/hdd1/tmp/output bs=8k count=10k;
10240+0 records in
10240+0 records out
83886080 bytes (84 MB, 80 MiB) copied, 0.782689 s, 107 MB/s

rm -f /mnt/hdd1/tmp/output


dd if=/dev/zero of=/mnt/hdd2/tmp/output bs=8k count=10k
10240+0 records in
10240+0 records out
83886080 bytes (84 MB, 80 MiB) copied, 0.445875 s, 188 MB/s

rm -f /mnt/hdd2/tmp/output
Several factors affect speed of SFTP transfer:
- Encryption. Though symmetric encryption is fast, it’s not that fast to be unnoticed. If you comparing speeds on fast network (100mbit or larger), encryption becomes a break for your process.
- Hash calculation and checking.
- Buffer copying. SFTP running on top of SSH causes each data block to be copied at least 6 times (3 times on each side) more comparing to plain FTP where data in best cases can be passed to network interface without being copied at all. And block copy takes a bit of time as well.
SFTP: 20MB/s
FTP: 110MB/s