1.Overview
PiKVM (https://pikvm.org/) is a very powerful and Open Source Software which allows for a remote connection via your Raspberry Pi to turn on/off or restart your computer, configure the UEFI/BIOS, and even reinstall the OS using the Virtual CD-ROM or Flash Drive. You can use your remote keyboard and mouse or PiKVM can simulate a keyboard, mouse, and a monitor, which are then presented in a web browser as if you were working on a remote system directly. It’s true hardware-level access with no dependency on any remote ports, protocols or services!
The KVM refers to Keyboard Video Mouse.
The PiKVM kit is designed and based on Raspberry Pi 4 Model B, also support Raspberry Pi 3B/3B+, but since Pi3 without OTG interface, when PiKVM-A3 is used with Pi3, OTG analog keyboard and mouse cannot be used.
PiKVM Metal Case will only support Raspberry Pi 4.
The PiKVM is composed of follow parts:
X630 HDMI to CSI-2 Module (for video capture)
X630-A3 HAT Expansion Board (for ethernet, cooling, RTC, power in etc)
X630-A5 Adapter Board (it will be install into the PC case to connect with computer motherboard)
0.96 inch OLED (for display, Resolution: 128×64 pixel)
Ethernet Cable (TIA/EIA-568.B, it’s ATX control signal cable)
The Metal Case(only support Raspberry Pi 4)
Manual
https://wiki.geekworm.com/PiKVM
Features
Designed especially for PiKVM ( Raspberry Pi based KVM over IP)
Works with the latest Raspberry Pi 4B
Fully compatiblie with PiKVM OS
Control a server and computer using a web browser
HDMI Full HD capture based on the TC358743 chip
OTG Keyboard & mouse; Mass Storage Drive emulation
Hardware Real Time Clock (RTC) with CR1220 coin battery socket
Equipped with cooling fan that allows the heat from your Raspberry Pi to dissipate
Equipped with solidstate relays to protect RPi GPIO pins from computer and ESD spikes
ATX control via RJ45 connector Switch the machine on or off, reset it, and monitor the status of HDD LED & power LED remotely
Reserves the 10pin SH1.0 connector for future I2S HDMI audio support
Reserves the 4pin header & spacers for I2C OLED display
Reserves the 40pin header that can be stacked with other Raspberry Pi accessory boards
How to Power on PiKVM
Power Input: 5.1Vdc +/-5% , ≥3A (Power Via USB Type-C port of X630-A3)
Parts List:


2.Assembling
Please follow this video to assamble the parts:


3.Flashing the OS image
Micro-SD Card Requirements
Minimum 16 Gb
Class 10 is strongly recommended
Download the image
For Raspberry Pi 4, please use the V3 HAT OS.
Raspberry Pi 4, v3 HAT platform:
For v3 HAT Platform only: v3-hdmi-rpi4-latest.img.xz [SHA-1]
https://files.pikvm.org/images/v3-hdmi-rpi4-box-latest.img.xz
Flash the image
1.Download and install the latest version of RPi Imager.
2.Run RPi Imager:

3.Press CHOOSE OS and select Use custom image at bottom of the list:

4.After clicking on this item, select the image file (.img.xz), then click CHOOSE STORAGE:

5.Insert the memory card into the card reader. Choose the card reader from this list. Be careful and choose the right device:

6.After choosing the memory card, press the WRITE button. Confirm the operation when you are asked about it:

7.Wait for the process to finish. Get yourself a coffee or do some stretching 🙂
The process may hang at 99% for a long time, this is okay, just wait for it to complete

8.Remove the memory card after successful completion:

4.First steps
https://docs.pikvm.org/first_steps/
4.1.Getting access to PiKVM
4.1.1. Default Password
PiKVM comes with the following default passwords:
- Linux admin (SSH, etc.): user root, password root.
- PiKVM Web Interface: user admin, password admin.
These are two separate entities with independent accounts. To change passwords, you will need to use the terminal (read below) access via SSH or Web Terminal. If you are using the Web Terminal, use the su – command to get root access (enter the root user password).
# rw
# passwd root
# kvmd-htpasswd set admin
# ro
If you require additional user changes you can use the following:
# kvmd-htpasswd set <user> # Sets a new user
# kvmd-htpasswd del <user> # Removes/deletes a user
4.1.2.Access to PiKVM Web Interface
In MOST networks you should be able to reach PiKVM via any browser with the URL https://192.168.0.100/ OR https://pikvm/. Google Chrome (Chromium), Firefox and Safari work best with 0 extensions enabled, if one works but the others do not, this is a browser/extension issue. Its advised you use Private window or Incog mode. Microsoft Edge and Internet Explorer are not supported.
The default user is admin and the password is also admin. After logging in, you will get access to the menu with the main functions. Using the Web terminal, you can change system settings and passwords.
The latest versions of Chrome on Mac OS do not allow access to the page with a self signed certificate, which is used in PiKVM by default. You can proceed by typing thisisunsafe and Chrome will then load the page.
4.1.3.Update PiKVM software
rw
pacman -Syu
reboot
4.2.Configuring PiKVM
Most of the PiKVM settings are done through configuration files. All configuration changes must be made from under the root user (that is, the administrator).
The PiKVM memory card is mounted in read-only mode. It protects the filesystem from damage in case of sudden power outage. To edit any files and make changes, it is necessary to remount the file system to the read-write mode.
- To enable write-mode, run command rw (under root).
- To disable it, run command ro.
- If you receive the message “Device is busy”, perform reboot.
4.3.Structure of configuration files
Most of the PiKVM configuration files are located in the /etc/kvmd directory.
The /etc/kvmd/main.yaml file defines the platform config and you should never edit it. To redefine system parameters use the file /etc/kvmd/override.yaml. All other files that are also not recommended for editing have read-only permissions.
In the /etc/kvmd/meta.yaml file you can specify some information regarding the host that this PiKVM manages.
A complete list of all parameters can be viewed using the kvmd -m command.
Files with the suffix .yaml uses the YAML syntax and describes a parameter tree with key-value pairs of different types. To define the parameters within one section, an indent of 4 spaces is used. Comments starts with the # symbol.
Only 4 spaces should be used for indentation.
Be careful when editing YAML and follow this rule. Invalid indentation or tabs instead of spaces will cause an error when starting the services.
4.4.Set Timezone
timedatectl set-timezone Canada/Eastern
timedatectl set-timezone America/New_York
4.5.Crontab Install
pacman -S cronie
systemctl enable cronie.service
systemctl start cronie.service
crontab -l
4.6.Enable the web terminal
New flash OS, default is enabled. DO NOT need to do anything here.
systemctl enable --now kvmd-webterm
To enable authorization completely edit the file /etc/kvmd/override.yaml:
kvmd:
    auth:
        enabled: enable
then restart kvmd:
systemctl restart kvmd
4.7.ATX power control
If you don’t need ATX power control you can disable the relevant Web-UI menu in /etc/kvmd/override.yaml:
kvmd:
    atx:
        type: disabled
then restart kvmd.
5.Network
5.1.Setting up Wi-Fi
The following describes how to setup a Wi-Fi connection on the default pikvm builds based on Arch Linux. The process might vary for other Linux distros. We recommend to do this while having a display and keyboard connected directly to the Raspberry Pi as you will loose network connectivity once you connect to a Wi-Fi. Alternatively you can connect to the PiKVM via SSH. The built-in Web Terminal (available through the browser) should also work.
Starting from 2021.10.19, the old way to configure Wi-Fi using netctl is deprecated. Instead, it is proposed to use a more native path with systemd-networkd, which is already used to configure Ethernet. Follow the guide and then delete the old netctl profile:
# rw
# systemctl disable netctl-auto@wlan0.service
# rm /etc/netctl/wlan0-*
# ro
1.Disable ipv6.
https://wiki.archlinux.org/title/IPv6#Disable_IPv6
add option ipv6.disable_ipv6=1 to /boot/cmdline.txt and perform reboot.
Adding ipv6.disable=1 to the kernel line disables the whole IPv6 stack.
One can also avoid assigning IPv6 addresses to all or specific network interfaces by adding the following sysctl configuration to /etc/sysctl.d/40-ipv6.conf:
# Disable IPv6
net.ipv6.conf.all.disable_ipv6 = 1
net.ipv6.conf.nic0.disable_ipv6 = 1
...
net.ipv6.conf.nicN.disable_ipv6 = 1
Restart the systemd-sysctl.service unit to apply the configuration changes.
Disabling IPv6 functionality in the kernel does not prevent other programs from trying to use IPv6. In most cases, this is completely harmless, but if you find yourself having issues with that program, you should consult the program’s manual pages for a way to disable that functionality.
dhcpcd will continue to harmlessly attempt to perform IPv6 router solicitation. To disable this, as stated in the dhcpcd.conf(5) man page, add the following to /etc/dhcpcd.conf:
noipv6rs
noipv6
Note: If disabling IPv6 via sysctl, you should comment out the IPv6 hosts in your /etc/hosts. Otherwise there could be some connection errors because hosts are resolved to their IPv6 address which is not reachable.
2.Create Wi-Fi settings file /etc/systemd/network/wlan0.network with following content:
copy eth0 to wlan0
cp eth0.network wlan0.network
change “Name” to “wlan0”
[Match]
Name=wlan0

[Network]
DHCP=yes
DNSSEC=no

# Use same IP by forcing to use MAC address for clientID
[DHCP]
ClientIdentifier=mac
consider to use static IP address:
[Match]
Name=wlan0

[Network]
Address=192.168.x.x/24
Gateway=192.168.x.x
DNS=192.168.x.x

# Use same IP by forcing to use MAC address for clientID
# --- I commented this out ---
# [DHCP]
# ClientIdentifier=mac
3.Set network ESSID and password:
# wpa_passphrase YourNetworkSSID 'YourNetworkPassword' > /etc/wpa_supplicant/wpa_supplicant-wlan0.conf
Option:
Add option country=US to /etc/wpa_supplicant/wpa_supplicant-wlan0.conf
4.Enable WPA-supplicant service:
systemctl enable wpa_supplicant@wlan0.service
5.Check WPA-supplicant service status:
systemctl status wpa_supplicant@wlan0.service
6.To get a DHCP lease, first release whatever leases you’re still holding onto (as root):
dhclient -r
Then ask for a new lease (of course replacing eth1 with the name of your network device, the same one as you used in the previous section):
dhclient wlan0
You now have an IP
7.Make filesystem read-only again using ro command
5.2.kvmd-certbot – Let’s Encrypt certificates
1.Update the OS
# rw
# pacman -Syu
# reboot
...
# kvmd-pstrun -- true
2.Switch filesystem to RW and obtain the certificate
# rw
# kvmd-certbot certonly_webroot --agree-tos -n --email xxx@gmail.com -d xxx.com

--    INFO -- Opening PST session ...
--    INFO -- PST write is allowed: /var/lib/kvmd/pst/data
--    INFO -- Running the process ...
+ mkdir -p /var/lib/kvmd/pst/data/certbot/runroot
+ chown -R kvmd-certbot: /var/lib/kvmd/pst/data/certbot/runroot/..
--    INFO -- Process finished: returncode=0
--    INFO -- Opening PST session ...
--    INFO -- PST write is allowed: /var/lib/kvmd/pst/data
--    INFO -- Running the process ...
Saving debug log to /var/lib/kvmd/pst/data/certbot/runroot/logs/letsencrypt.log
Requesting a certificate for snow-mon.com

Certbot failed to authenticate some domains (authenticator: webroot). The Certificate Authority reported these problems:
  Domain: snow-mon.com
  Type:   connection
  Detail: 25.33.25.136: Fetching http://xxxxx.com/.well-known/acme-challenge/S1jaTAwozVhqC8IwmdTzvEWK1l9GecokmOxtOL2iWnY: Timeout during connect (likely firewall problem)

Hint: The Certificate Authority failed to download the temporary challenge files created by Certbot. Ensure that the listed domains serve their content from the provided --webroot-path/-w and that files created there can be downloaded from the internet.

Some challenges have failed.
Ask for help or search for solutions at https://community.letsencrypt.org. See the logfile /var/lib/kvmd/pst/data/certbot/runroot/logs/letsencrypt.log or re-run Certbot with -v for more details.
--    INFO -- Process finished: returncode=1
3.Install the certificate for KVMD-Nginx
# kvmd-certbot install_nginx pikvm.example.com
# kvmd-certbot install_vnc pikvm.example.com
# ro
5.3.certbot manully get certificates
https://github.com/pikvm/pikvm/issues/226
rw
pacman -S certbot

certbot certonly --agree-tos --manual --preferred-challenges=dns -d example.com

Saving debug log to /var/log/letsencrypt/letsencrypt.log
Requesting a certificate for snow-mon.com

- - - - - - - - - - - - - - - - - - - - - - - - - - - - - - - - - - - - - - - -
Please deploy a DNS TXT record under the name:

_acme-challenge.example.com.

with the following value:

h1NCumOWTbcvUXw57XzUhlQV8pvaHOvnadW4167FQ2g

Before continuing, verify the TXT record has been deployed. Depending on the DNS
provider, this may take some time, from a few seconds to multiple minutes. You can
check if it has finished deploying with aid of online tools, such as the Google
Admin Toolbox: https://toolbox.googleapps.com/apps/dig/#TXT/_acme-challenge.example.com.
Look for one or more bolded line(s) below the line ';ANSWER'. It should show the
value(s) you've just added.

- - - - - - - - - - - - - - - - - - - - - - - - - - - - - - - - - - - - - - - -
Press Enter to Continue

Saving debug log to /var/log/letsencrypt/letsencrypt.log
Requesting a certificate for example.com

Successfully received certificate.
Certificate is saved at: /etc/letsencrypt/live/example.com/fullchain.pem
Key is saved at:         /etc/letsencrypt/live/example.com/privkey.pem
This certificate expires on 2022-12-27.
These files will be updated when the certificate renews.

NEXT STEPS:
- This certificate will not be renewed automatically. Autorenewal of --manual certificates requires the use of an authentication hook script (--manual-auth-hook) but one was not provided. To renew this certificate, repeat this same certbot command before the certificate's expiry date.

- - - - - - - - - - - - - - - - - - - - - - - - - - - - - - - - - - - - - - - -
If you like Certbot, please consider supporting our work by:
 * Donating to ISRG / Let's Encrypt:   https://letsencrypt.org/donate
 * Donating to EFF:                    https://eff.org/donate-le
- - - - - - - - - - - - - - - - - - - - - - - - - - - - - - - - - - - - - - - -
It is now time to configure PI-KVM/NGINX to use your new certificate. NGINX is the service that provides the web services for PI-KVM.
cd /etc/kvmd/nginx
cat ssl.conf

ssl_protocols TLSv1.3 TLSv1.2 TLSv1.1 TLSv1;
ssl_ciphers "EECDH+AESGCM:EDH+AESGCM:AES256+EECDH:AES256+EDH";
ssl_certificate /etc/kvmd/nginx/ssl/server.crt;
ssl_certificate_key /etc/kvmd/nginx/ssl/server.key;
add_header Strict-Transport-Security "max-age=31536000; includeSubDomains" always;

mv /etc/kvmd/nginx/ssl/server.key /etc/kvmd/nginx/ssl/server.key.old
mv /etc/kvmd/nginx/ssl/server.crt /etc/kvmd/nginx/ssl/server.crt.old
ln -s /etc/letsencrypt/live/yourdomain.com/privkey.pem /etc/kvmd/nginx/ssl/server.key
ln -s /etc/letsencrypt/live/yourdomain.com/fullchain.pem /etc/kvmd/nginx/ssl/server.crt


systemctl restart kvmd-nginx
5.4.acme.sh
https://github.com/acmesh-official
https://github.com/acmesh-official/acme.sh/wiki/%E8%AF%B4%E6%98%8E
6.How to
6.1. How to change WiFi password
STEP1: change OS system to read-write mode
# rw
STEP2: change Wi-Fi settings file /etc/systemd/network/wlan0.network
wpa_passphrase YourNetworkSSID 'YourNetworkPassword' >> /etc/wpa_supplicant/wpa_supplicant-wlan0.conf


vi /etc/systemd/network/wlan0.network
# Delete the line with old NetworkSSID, if there is one
STEP 3: Restart WPA-supplicant service:
systemctl restart wpa_supplicant@wlan0.service
STEP4: change OS system to read-only mode
# ro
Change WiFi, having this problem:
Raspberry pi wpa_supplicant can’t connect on a specific wifi. CTRL-EVENT-ASSOC-REJECT status_code = 16
It was related to the fast roaming feature. To temporarily disable it for the Broadcom WiFi driver, run the following two commands:
systemctl stop wpa_supplicant@wlan0.service**
rmmod brcmfmac
modprobe brcmfmac roamoff=1 feature_disable=0x82000
systemctl start wpa_supplicant@wlan0.service
If the connection was successful, you can persist the roamoff setting by creating /etc/modprobe.d/brcmfmac.conf with the following content:
options brcmfmac roamoff=1
6.2. How to change OTG device display name

Example: /etc/kvmd/override.yaml
kvmd:
    auth:
        enabled: true
    atx:
        type: disabled
    msd:
        type: disabled
    hid:
        type: BT
        manufacturer: HP
        product: "HID Device"
        description: "Keyboard and Mouse"
    otg:
        manufacturer: HP
        product: KU-0316 Keyboard
        vendor_id: 0x03F0
        product_id: 0x0024
        serial: BN182825817W
The kvmd-otgconf utility allows you to view and modify the USB configuration on the fly. It requires root permission and can be used for example from a web terminal.
View the config:
# kvmd-otgconf
+ hid.usb0  # Keyboard
+ hid.usb1  # Absolute Mouse
+ hid.usb2  # Relative Mouse
+ mass_storage.usb0  # Mass Storage Drive
Each line represents a device (function). First comes plus or minus sign (the device on or off), then the name of the device and its description.
Disabling the device:
[root@pikvm ~]# kvmd-otgconf --disable-function mass_storage.usb0
+ hid.usb0  # Keyboard
+ hid.usb1  # Absolute Mouse
+ hid.usb2  # Relative Mouse
- mass_storage.usb0  # Mass Storage Drive
Enabling the device:
[root@pikvm ~]# kvmd-otgconf --enable-function mass_storage.usb0
+ hid.usb0  # Keyboard
+ hid.usb1  # Absolute Mouse
+ hid.usb2  # Relative Mouse
+ mass_storage.usb0  # Mass Storage Drive
6.3. How to change monitor device display name
kvmd-edidconf --set-monitor-name=SAMSUNG --set-mfc-id=SAM --set-product-id=57389 --set-serial=3782674670 --apply
kvmd-edidconf --set-monitor-name=ACER --set-mfc-id=ACR --set-product-id=26498 --set-serial=2893755130 --apply
Editing EDID:
1.Download wxWidgets
Go to https://www.wxwidgets.org/downloads/ to download the latest stable release.
Click on the download link Source for Linux, macOS, etc. to download the source files of the toolkit.
Unzip the downloaded zip file in your home directory:
tar -xjvf wxWidgets-3.0.5.tar.bz2
cd wxWidgets-3.0.5/
3.Build and install wxWidgets on Ubuntu
Build wxWidgets on top of the GIMP Toolkit (GTK) libraries which are already installed in Ubuntu. GTK is
a multi-platform toolkit for creating graphical user interfaces. See https://www.gtk.org/
First download and install the GTK development package. In the Ubuntu terminal, enter the following
command on the command line:
sudo apt install libgtk-3-dev
Enter your wxWidgets directory, create a new subdirectory gtk-build, and cd to it:
mkdir gtk-build
cd gtk-build
Configure and build the wxWidgets libraries (make takes a long time, half an hour):
../configure –-with-gtk
make
Enter the following commands to install the wxWidgets header files in the standard directory
/usr/local/include and the library in the standard directory /usr/local/lib:
sudo su
make install
ldconfig
exit
Build all the sample programs (takes a long time):
cd samples
make
You should now be able to run the minimal sample program:
cd ../samples/minimal
./minimal

2.Download wxEDID
https://sourceforge.net/projects/wxedid
copy to your home directory. Uncompress the package:
tar -xzvf wxedid-0.0.27.tar.gz
3.Build and install wxEDID on Ubuntu
cd wxedid-0.0.27/
./configure
make
sudo make install
4.Switch filesystem to RW-mode
rw
5.Export the system edid to a HEX ASCII file
kvmd-edidconf --export-bin=/root/myedid.bin

kvmd-edidconf --import=/root/myedid.bin --edid=/root/myedid.hex
6.Copy HEX ASCII file to your Ubuntu system and edit the file
cd to your wxWidgets directory. run wxedid tool:
/your_home_dir/wxedid-0.0.27/wxedid &


Change the name to your prefer name.
save and copy it back to PiKVM.
7.Apply EDID
kvmd-edidconf --edid=/root/myedid.hex --apply
8.DO NOT REBOOT the PiKVM.
Unplug HDMI cable and plug it back.
Check the name of Display 2.
7.If everything works, you can copy to /etc/kvmd/tc358743-edid.hex
cp /root/myedid.hex /etc/kvmd/tc358743-edid.hex
8.Reboot PiKVM
6.4. Simulate a HP Monitor
https://github.com/linuxhw/EDID
See full list of digital monitors in the DigitalDisplay.md file.
| HP               | HWP2958 | ZR2740w          | 1280x720  | 27.2 | 2013 | [657069A73FFE](<Digital/HP/HWP2958/657069A73FFE>)

https://github.com/linuxhw/EDID/blob/master/Digital/HP/HWP2958/657069A73FFE

00 ff ff ff ff ff ff 00 22 f0 58 29 00 00 00 00
0c 17 01 04 81 3c 22 78 22 2e 25 a7 55 4d 9e 26
0c 50 54 00 00 00 01 01 01 01 01 01 01 01 01 01
01 01 01 01 01 01 1a 1d 00 80 51 d0 1c 20 40 80
75 00 55 50 21 00 00 1e 1a 1d 00 80 51 d0 1c 20
40 80 75 00 55 50 21 00 00 1e 00 00 00 fc 00 48
50 20 5a 52 32 37 34 30 77 0a 20 20 00 00 00 ff
00 43 4e 54 33 31 32 59 31 4b 36 0a 20 20 00 9b
6.5. How to test network speed
iperf is one of the useful utilities to test point-to-point bandwidth.
iperf is a tool for active measurements of the maximum achievable bandwidth on IP networks. It supports tuning of various parameters related to timing, protocols, and buffers. For each test it reports the measured throughput / bitrate, loss, and other parameters.
For more information see: https://software.es.net/iperf
Source code and issue tracker: https://github.com/esnet/iperf
Discussion forums: https://github.com/esnet/iperf/discussions
Downloads of iperf3 are available at: https://downloads.es.net/pub/iperf/
wget https://downloads.es.net/pub/iperf/iperf-3.12.tar.gz
tar -zxvf iperf-3.12.tar.gz
cd iperf-3.12
./configure -prefix /usr; make; make install
How to use iPerf3 to measure throughput?
First,Type the following command:
iperf3 -s -p 7000
This command tells this instance of iPerf3 that it will be functioning as a server — or waiting to receive data. By default, the iPerf3 server will listen on port 5001. You may need to know this to configure your firewall to map traffic for the iPerf3 port to your iPerf3 server.
Second, Type the following command on client server:
iperf3 -c 192.168.1.100 -p 7000
The -c tells the iPerf3 instance to function as a client station.
By default, the benchmark will run for 20 seconds. Then, it will present the average throughput for the run.
speedtest-cli
With Speedtest CLI, you can easily:
- Measure internet connection performance metrics like download, upload, latency and packet loss natively without relying on a web browser
- Test the internet connection of your Linux desktop, a remote server or even lower-powered devices such as the Raspberry Pi® with the Speedtest Server Network™
- Set up automated scripts to collect connection performance data, including trends over time
- Use Speedtest in your programs by wrapping it in the programming language of your choice
- View test results via CSV, JSONL or JSON
https://www.speedtest.net/apps/cli
6.6. How to update certificate
Run Certbot manully to get a certificate.
sudo certbot certonly –nginx
certbot certonly -d youdomain.com -d youdomain.com
Saving debug log to /var/log/letsencrypt/letsencrypt.log
Which names would you like to activate HTTPS for?
We recommend selecting either all domains, or all domains in a VirtualHost/server block.
1: youdomain.com
Select the appropriate numbers separated by commas and/or spaces, or leave input
blank to select all options shown (Enter ‘c’ to cancel): 1
Requesting a certificate for youdomain.com
Successfully received certificate.
Certificate is saved at: /etc/letsencrypt/live/youdomain.com/fullchain.pem
Key is saved at: /etc/letsencrypt/live/youdomain.com/privkey.pem
This certificate expires on 2023-01-19.
These files will be updated when the certificate renews.
Certbot has set up a scheduled task to automatically renew this certificate in the background.
We were unable to subscribe you the EFF mailing list because your e-mail address appears to be invalid. You can try again later by visiting https://act.eff.org.
If you like Certbot, please consider supporting our work by:
* Donating to ISRG / Let’s Encrypt: https://letsencrypt.org/donate
* Donating to EFF: https://eff.org/donate-le
Enter this command:
certbot certificates
Saving debug log to /var/log/letsencrypt/letsencrypt.log
Found the following certs:
Certificate Name: youdomain.com
Serial Number: 3415948d154464400e6d17ad8b39385ad23
Key Type: RSA
Domains: youdomain.com youdomain.com
Expiry Date: 2023-01-19 23:02:02+00:00 (VALID: 89 days)
Certificate Path: /etc/letsencrypt/live/youdomain.com/fullchain.pem
Private Key Path: /etc/letsencrypt/live/youdomain.com/privkey.pem
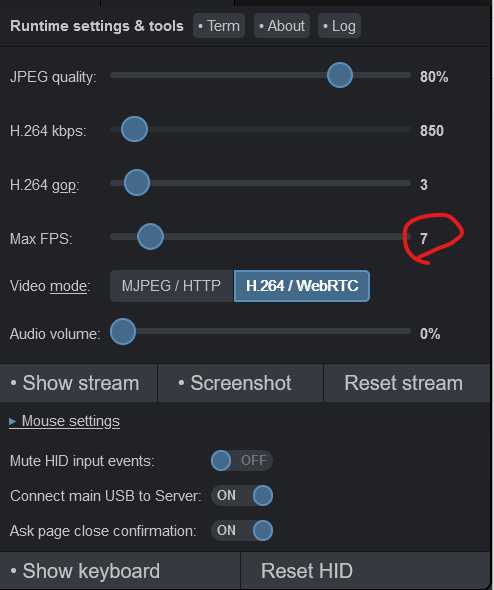
6.7. H.264 issues
Used Custom Janus config
systemctl disable --now kvmd-janus
systemctl enable --now kvmd-janus-static
change the Janus configuration
vi /etc/kvmd/janus/janus.jcfg
- you have to used a double quote on the value of stun_server
- you have to set parameter rtp_port_range
- you have to set a nat mapping ip on your router WAN IP
- The port range should be the same as port forward settings in your router
general: {
    debug_level = 4
}
nat: {
    nice_debug = false
    ignore_mdns = true
    nat_1_1_mapping = "104.33.71.238"
    stun_server =  "stun.l.google.com"
    stun_prot = 19302
}
media: {
    ipv6 = false
    ipv6_linklocal = false
    min_nack_queue = 2000
    rtp_port_range = "20001-20020"
    no_media_timer = 0
    slowlink_threshold = 10
    twcc_period = 100
    dtls_timeout = 1000
    nack_optimizations = true
}
restart kvmd-janus-static service
systemctl restart kvmd-janus-static
check status
systemctl status kvmd-janus-static


* kvmd-janus-static.service - PiKVM - Janus WebRTC Gateway (Static Config)
     Loaded: loaded (/usr/lib/systemd/system/kvmd-janus-static.service; enabled; preset: disabled)
     Active: active (running) since Thu 2024-04-11 00:42:02 EDT; 513ms ago
   Main PID: 6651 (janus)
      Tasks: 2 (limit: 4915)
        CPU: 66ms
     CGroup: /system.slice/kvmd-janus-static.service
             `-6651 /usr/bin/janus --disable-colors --plugins-folder=/usr/lib/ustreamer/janus --configs-folder=/etc/kvmd/janus

Apr 11 00:42:02 pikvm janus[6651]: Token based authentication disabled
Apr 11 00:42:02 pikvm janus[6651]: Initializing recorder code
Apr 11 00:42:02 pikvm janus[6651]: RTP port range: 20001 -- 20003
Apr 11 00:42:02 pikvm janus[6651]: Using nat_1_1_mapping for public IP: 104.33.71.238
Apr 11 00:42:02 pikvm janus[6651]: Initializing ICE stuff (Full mode, ICE-TCP candidates disabled, half-trickle, IPv6 support disabled)
Apr 11 00:42:02 pikvm janus[6651]: ICE port range: 20001-20003
Apr 11 00:42:02 pikvm janus[6651]: [WARN] mDNS resolution disabled, .local candidates will be ignored
Apr 11 00:42:02 pikvm janus[6651]: STUN server to use: stun.l.google.com:3478
Apr 11 00:42:02 pikvm janus[6651]:   >> 2001:4860:4864:5:8000::1:3478 (IPv6)
Apr 11 00:42:02 pikvm janus[6651]: Testing STUN server: message is of 20 bytes
restart pikvm, not working anymore
add UDP port forward.
systemctl disable --now kvmd-janus-static
systemctl enable --now kvmd-janus
reboot
Tried on mirosoft edge browser and Google chrome all worked.