1.Requirements and high level steps
Requirements
Ubuntu 20.04.5 LTS (Focal Fossa)
MySQL 8.0
Nginx 1.18.0
Steps
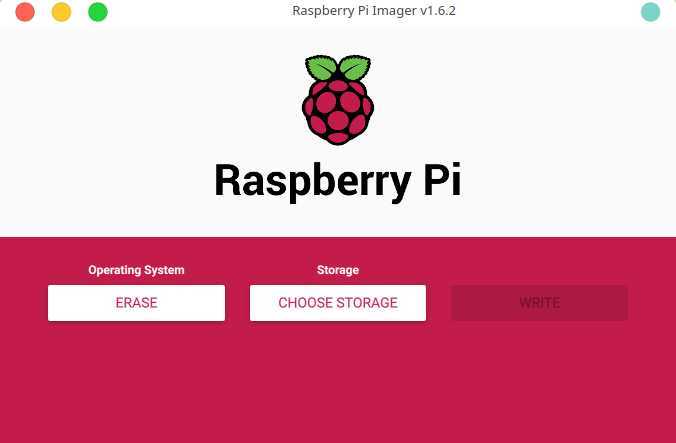
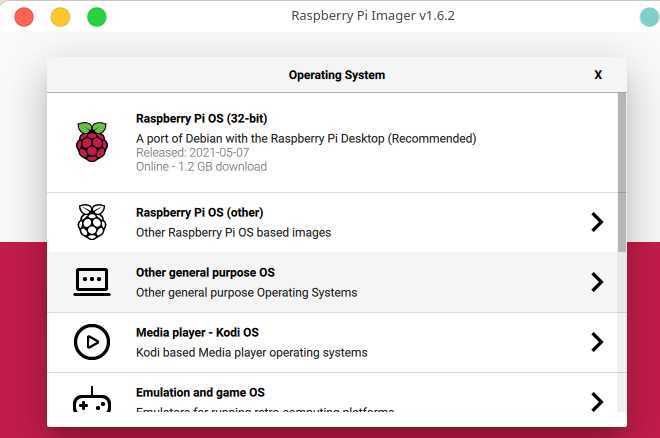
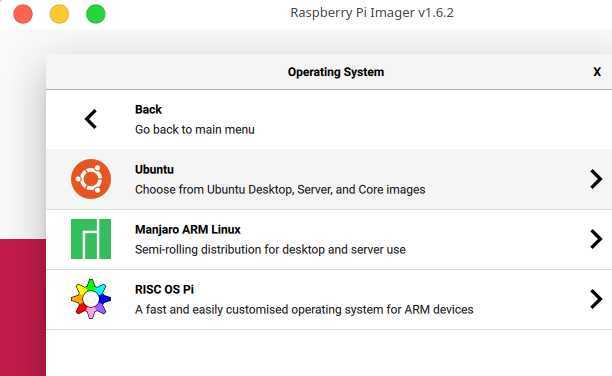
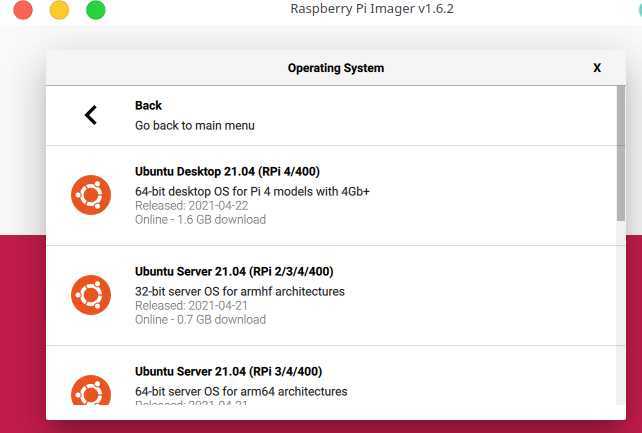
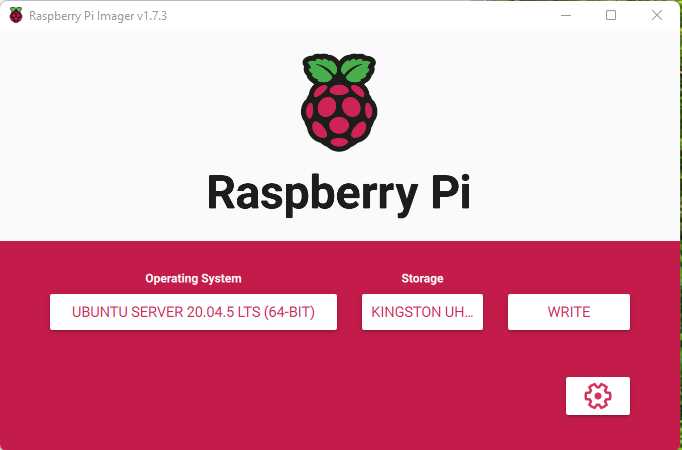
Download and write the Ubuntu server 64 bit image to a micro SD card
Install Ubuntu server 64 bit OS on RPi
Configure External Storage
Install MySQL
Install Seafile
2.Install Ubuntu server 64 bit
2.1.write the Ubuntu image to SD Card
download: ubuntu-22.04.1-preinstalled-server-arm64+raspi.img
The default username is “ ubuntu “. The default password is “ ubuntu “. When you first log in using these details, you will be asked to change the password to something more secure. Enter a secure alternative password to continue using the operating system.
2.2.update Ubuntu
sudo apt update
sudo apt upgrade

sudo apt-get purge needrestart
Python3.10 installed by default.PIP3 not installed by default.
sudo apt-get install -y python3-pip
2.3.Set or Change Timezone
timedatectl list-timezones
sudo timedatectl set-timezone  America/Toronto
2.4.Install some optional apps
vim, htop, unzip, make and net-tools
sudo apt-get install vim
sudo apt-get install htop
sudo apt-get install net-tools
sudo apt-get install unzip
#install gcc, g++ and make
sudo apt install build-essential
sudo apt install vsftpd
2.5.Add user
groupadd nas
useradd -m -d /home/nas -g nas -s /bin/bash  nas
2.6.Disable IPv6
Step1: Check your IP address in Ubuntu
ip a
you should see an IPv6 address if it is enabled
Step2: To disable IPv6 you only have to input 3 commands:
sudo sysctl -w net.ipv6.conf.all.disable_ipv6=1
sudo sysctl -w net.ipv6.conf.default.disable_ipv6=1
sudo sysctl -w net.ipv6.conf.lo.disable_ipv6=1
Step3: check if it worked
ip a
this only temporarily disables IPv6.
Step4: Modify /etc/sysctl.conf
Add the following lines to the file:
net.ipv6.conf.all.disable_ipv6=1
net.ipv6.conf.default.disable_ipv6=1
net.ipv6.conf.lo.disable_ipv6=1
Step5: For the settings to take effect use:
sudo sysctl -p
Step6: create (with root privileges) the file /etc/rc.local and fill it with:
#!/bin/bash
# /etc/rc.local

/etc/sysctl.d
/etc/init.d/procps restart

exit 0
Step7: make the file executable
sudo chmod 755 /etc/rc.local
Step7: edit /etc/sysctl.conf
net.ipv6.conf.all.disable_ipv6 = 1
net.ipv6.conf.default.disable_ipv6 = 1
2.7.Change Host Name
1.Type the following command to edit /etc/hostname using text editor:
vi /etc/hostname
Delete the old name and setup new name.
2.Edit the /etc/hosts file:
vi /etc/hosts
add new line:
127.0.0.1 <your host name>
3.Reboot the system to changes take effect:
2.8.Install PWM fan control script
For ubuntu mate / ubuntun desktop / ubuntu server
Test this script based on the following OS:
- ubuntu-mate-20.04.1-desktop
- ubuntu server 21.04
- ubuntu-21.04-preinstalled-desktop-arm64+raspi
install
cd ~
sudo apt-get update
sudo apt-get upgrade

sudo apt-get install -y unzip make gcc python git wiringpi python3-pigpio python-setuptools python3-rpi.gpio
sudo apt-get install -y python3-distutils

#install pigpio library, also refer to http://abyz.me.uk/rpi/pigpio/download.html
wget https://github.com/joan2937/pigpio/archive/master.zip
unzip master.zip
cd pigpio-master
sudo make
sudo make install

cd ~
git clone https://github.com/geekworm-com/x-c1
cd x-c1
sudo chmod +x *.sh
sudo bash install-ubuntu.sh

echo "alias xoff='sudo /usr/local/bin/x-c1-softsd.sh'" >> ~/.bashrc
sudo reboot
Test safe shutdown
xoff
- Please run ‘xoff’ to shut down or press the on-board button switch to shut down. DON’T run the ‘shutdown’ linux command to shut down, otherwise the power of X-C1 will not be shut down.
- press button switch 1-2 seconds to reboot
- press button switch 3 seconds to safe shutdown,
- press 7-8 seconds to force shutdown.
uninstall
sudo ./uninstall-ubuntu.sh
2.9.Configure firewall
Step 1 – To view status of ufw, type:
sudo ufw status
Step 2 – Open SSH TCP port 22
sudo ufw allow ssh
Step 3 – Turn on firewall
sudo ufw enable
Step 4 – Open specific incoming connections/ports
sudo ufw allow 443/tcp comment 'accept HTTPS connections'
Step 5 – Verify status of UFW
sudo ufw status
Step 6 – Other command used to configure firewall
UFW delete rules
sudo ufw status numbered
sudo ufw delete 6
Reset the ufw
sudo ufw reset
Reload the ufw
sudo ufw reload
3.Configure External Storage
3.1.check hard drive health
smartmontools package is available in the repositories of all the major Linux distributions
apt-get update && sudo apt-get install smartmontools
Checking if SMART is enabled on the device
sudo smartctl -i /dev/sda
Get location of the disk
sudo blkid
/dev/sdb1: UUID="c5fe051a-bfc3-40a3-81b3-c83045748e3e" BLOCK_SIZE="4096" TYPE="ext4" PARTUUID="114b305a-4af1-4ace-8853-9d1854a14d18"
/dev/mmcblk0p1: LABEL_FATBOOT="system-boot" LABEL="system-boot" UUID="D7E2-9D99" BLOCK_SIZE="512" TYPE="vfat" PARTUUID="b0a6845e-01"
/dev/mmcblk0p2: LABEL="writable" UUID="b09bb4c8-de4d-4ce6-a93f-30c4c9241a58" BLOCK_SIZE="4096" TYPE="ext4" PARTUUID="b0a6845e-02"
/dev/sda1: UUID="5bcd4331-7026-4851-9af3-aa92cf0de456" BLOCK_SIZE="4096" TYPE="ext4" PARTUUID="fa0c1cff-64ee-4203-b23e-0d9d1c36fcaf"
sudo smartctl -i /dev/sda
smartctl 7.2 2020-12-30 r5155 [aarch64-linux-5.15.0-1015-raspi] (local build)
Copyright (C) 2002-20, Bruce Allen, Christian Franke, www.smartmontools.org

=== START OF INFORMATION SECTION ===
Device Model:     WDC WD10SPCX-24HWST1
Serial Number:    WD-WX71A8592K04
Firmware Version: 80103060
User Capacity:    1,000,204,886,016 bytes [1.00 TB]
Sector Size:      512 bytes logical/physical
Device is:        Not in smartctl database [for details use: -P showall]
ATA Version is:   ATA/ATAPI-7 (minor revision not indicated)
Local Time is:    Sat Oct  1 15:19:56 2022 UTC
SMART support is: Available - device has SMART capability.
SMART support is: Enabled


sudo smartctl -i /dev/sdb
smartctl 7.2 2020-12-30 r5155 [aarch64-linux-5.15.0-1015-raspi] (local build)
Copyright (C) 2002-20, Bruce Allen, Christian Franke, www.smartmontools.org

=== START OF INFORMATION SECTION ===
Model Family:     Western Digital Blue Mobile
Device Model:     WDC WD10JPVX-08JC3T6
Serial Number:    WD-WX41A1717U04
LU WWN Device Id: 5 0014ee 6b2101739
Firmware Version: 08.01A08
User Capacity:    1,000,204,886,016 bytes [1.00 TB]
Sector Sizes:     512 bytes logical, 4096 bytes physical
Rotation Rate:    5400 rpm
Device is:        In smartctl database [for details use: -P show]
ATA Version is:   ACS-2 (minor revision not indicated)
SATA Version is:  SATA 3.0, 6.0 Gb/s (current: 6.0 Gb/s)
Local Time is:    Sat Oct  1 15:20:51 2022 UTC
SMART support is: Available - device has SMART capability.
SMART support is: Enabled
If SMART is disabled, run this command:
sudo smartctl -s on /dev/sda
To get all the available SMART information about a storage device
sudo smartctl -a /dev/sda

SMART Attributes Data Structure revision number: 16
Vendor Specific SMART Attributes with Thresholds:
ID# ATTRIBUTE_NAME          FLAG     VALUE WORST THRESH TYPE      UPDATED  WHEN_FAILED RAW_VALUE
  1 Raw_Read_Error_Rate     0x002f   200   200   051    Pre-fail  Always       -       12
  3 Spin_Up_Time            0x0027   190   183   021    Pre-fail  Always       -       1475
  4 Start_Stop_Count        0x0032   098   098   000    Old_age   Always       -       2229
  5 Reallocated_Sector_Ct   0x0033   185   185   140    Pre-fail  Always       -       646
  7 Seek_Error_Rate         0x002f   200   200   051    Pre-fail  Always       -       0
  9 Power_On_Hours          0x0032   098   098   000    Old_age   Always       -       2093
 10 Spin_Retry_Count        0x0032   100   100   000    Old_age   Always       -       0
 11 Calibration_Retry_Count 0x0032   100   100   000    Old_age   Always       -       0
 12 Power_Cycle_Count       0x0032   099   099   000    Old_age   Always       -       1168
192 Power-Off_Retract_Count 0x0032   200   200   000    Old_age   Always       -       72
193 Load_Cycle_Count        0x0032   199   199   000    Old_age   Always       -       5864
194 Temperature_Celsius     0x0022   115   095   000    Old_age   Always       -       32
196 Reallocated_Event_Count 0x0032   138   138   000    Old_age   Always       -       62
197 Current_Pending_Sector  0x0032   200   200   000    Old_age   Always       -       0
198 Offline_Uncorrectable   0x0030   100   253   000    Old_age   Offline      -       0
199 UDMA_CRC_Error_Count    0x0032   200   200   000    Old_age   Always       -       120
200 Multi_Zone_Error_Rate   0x0008   200   200   000    Old_age   Offline      -       0
240 Head_Flying_Hours       0x0032   099   099   000    Old_age   Always       -       1395

Read SMART Error Log failed: scsi error aborted command

Read SMART Self-test Log failed: scsi error aborted command

Read SMART Selective Self-test Log failed: scsi error aborted command


sudo smartctl -a /dev/sdb
SMART Attributes Data Structure revision number: 16
Vendor Specific SMART Attributes with Thresholds:
ID# ATTRIBUTE_NAME          FLAG     VALUE WORST THRESH TYPE      UPDATED  WHEN_FAILED RAW_VALUE
  1 Raw_Read_Error_Rate     0x002f   200   200   051    Pre-fail  Always       -       0
  3 Spin_Up_Time            0x0027   187   183   021    Pre-fail  Always       -       1641
  4 Start_Stop_Count        0x0032   001   001   000    Old_age   Always       -       118119
  5 Reallocated_Sector_Ct   0x0033   200   200   140    Pre-fail  Always       -       0
  7 Seek_Error_Rate         0x002f   200   200   051    Pre-fail  Always       -       0
  9 Power_On_Hours          0x0032   094   094   000    Old_age   Always       -       4890
 10 Spin_Retry_Count        0x0032   100   100   000    Old_age   Always       -       0
 11 Calibration_Retry_Count 0x0032   100   100   000    Old_age   Always       -       0
 12 Power_Cycle_Count       0x0032   098   098   000    Old_age   Always       -       2648
192 Power-Off_Retract_Count 0x0032   199   199   000    Old_age   Always       -       876
193 Load_Cycle_Count        0x0032   147   147   000    Old_age   Always       -       159557
194 Temperature_Celsius     0x0022   111   094   000    Old_age   Always       -       36
196 Reallocated_Event_Count 0x0032   200   200   000    Old_age   Always       -       0
197 Current_Pending_Sector  0x0032   200   200   000    Old_age   Always       -       0
198 Offline_Uncorrectable   0x0030   100   253   000    Old_age   Offline      -       0
199 UDMA_CRC_Error_Count    0x0032   200   200   000    Old_age   Always       -       0
200 Multi_Zone_Error_Rate   0x0008   100   253   000    Old_age   Offline      -       0
240 Head_Flying_Hours       0x0032   098   098   000    Old_age   Always       -       2173

SMART Error Log Version: 1
No Errors Logged

SMART Self-test log structure revision number 1
Num  Test_Description    Status                  Remaining  LifeTime(hours)  LBA_of_first_error
# 1  Short offline       Interrupted (host reset)      90%         3         -

SMART Selective self-test log data structure revision number 1
 SPAN  MIN_LBA  MAX_LBA  CURRENT_TEST_STATUS
    1        0        0  Not_testing
    2        0        0  Not_testing
    3        0        0  Not_testing
    4        0        0  Not_testing
    5        0        0  Not_testing
Selective self-test flags (0x0):
  After scanning selected spans, do NOT read-scan remainder of disk.
If Selective self-test is pending on power-up, resume after 0 minute delay.
Very important parameters to check are, among the others, “Reallocated_Sector_Ct” and “Current_Pending_Sector”. In both cases if the RAW_VALUE is something other than 0, we should be very careful and start to backup data on the hard drive. The Reallocated_Sector_Ct is the count of sectors on the block device which cannot be used correctly.
Create Partition
fdisk /dev/sda
create ext4 filesystem
mkfs.ext4 /dev/sda1
3.2.Mount the HDD
Make a target directory
mkdir -p /mnt/hdd1
mkdir -p /mnt/hdd2
mount /dev/sda1 /mnt/hdd1
mount /dev/sdb1 /mnt/hdd2
vi /etc/fstab

/dev/sda1 /mnt/hdd1 ext4 defaults 0 0
/dev/sdb1 /mnt/hdd2 ext4 defaults 0 0
Reboot and verify the drive is being automatically mounted.
sudo reboot
ls /mnt/hdd1
4.Install MySQL Database Server
4.1.Install MySQL software
use apt to acquire and install this software:
apt install mysql-server
When prompted, confirm installation by typing Y, and then ENTER.
4.2.configure the password policy
OPTION 1:
Run a security script that comes pre-installed with MySQL. This script will remove some insecure default settings and lock down access to your database system. Start the interactive script by running:
mysql_secure_installation
OPTION 2:
show variables like 'validate_password%';
set global validate_password.length = 8;
set global validate_password.policy = 2;
4.3.Set root password
alter user 'root'@'localhost' identified by '<your root password>';
alter user 'root'@'localhost' identified with mysql_native_password;
For a long time, MySQL has supported different authentication plugins, basically programable pieces of code to demonstrate that a mysql accounts is owned by whoever claims so.
The original way to do that is to setup a password, hash it in a particular way, and store it on the mysql.user table. However, it is not the only way you can authenticate, for example:
– The unix socket authentication allows login to uses on the local machine with the same unix name than the mysql account. That is commonly used for admin accounts for things like monitoring or other tasks without needing to maintain a password. It has that name because it only works with socket connections (not remotelly)
– A PAM autentication plugin allows to set up, for example, an LDAP backed system and use that to authenticate (nice to integrate it into an existing organization)
– The latest versions of mysql (8.0) use a less trivial authentication method (caching_sha2_password), which in theory is more secure (I am not saying it is or it is not, but certainly the default “native” one was quite bad), but may require updates of client drivers and applications, so you can always revert to the older one for compatibility reasons.
Basically, mysql_native_password is the traditional method to authenticate- it is not very secure (it uses just a hash of the password), but it is compatible with older drivers. If you are going to start a new mysql service, you probably want to use the new plugin from the start (and TLS). If you have special needs, you can use other method- you can even program one if you have certain special needs).
You can chose a different method for each individual user- for example, your normal applications can use mysql_native_password or the new sha2 one, but you can make sure your admin accounts use a 2-factor authentication token, and unix_socket for a monitoring user gathering statistics on the mysql server. Those other authentication methods may or may not use the password field on the mysql.user table, like the native one does (they may store the password elswhere, or they may not even have a concept of a password!).
ALTER USER 'root'@'localhost' IDENTIFIED WITH mysql_native_password BY '<password>';
and
ALTER USER 'root'@'localhost' IDENTIFIED BY '<password>';
Are essentially the same, mysql_native_password is normally the default authentication method. With WITH you can decide which method to use. For example, if you use GRANT USAGE ON . TO root@localhost IDENTIFIED WITH socket_auth, you are setting that user to use unix socket authentication. MariaDB uses a slightly different syntax: VIA unix_socket. Running those command mainly results in an update of the mysql.user table.
Note ALTER / GRANT works automatically on next user login, while UPDATEing directly the mysql.user table may require a FLUSH PRIVILEGES, and has some issues on certain scenarios (Galera, etc.).
4.4.Check MySQL status
systemctl status mysqld
4.5.Locate the Unix socket file
mysql>status
UNIX socket:            /var/run/mysqld/mysqld.sock
4.6.Create a database and a user
CREATE DATABASE filerun;
create a separate MySQL user account that will manage the newly created database. Creating one-function databases and accounts is a good idea from a management and security standpoint. As with the naming of the database, choose a username that you prefer.
CREATE USER 'filerun'@'localhost' IDENTIFIED WITH mysql_native_password BY '<password>';
grant all privileges to the user on the newly created database:
GRANT ALL ON filerun.* TO 'filerun'@'localhost';
With the user assigned access to the database, perform the flush-privileges operation to ensure that the running instance of MySQL knows about the recent privilege assignment:
FLUSH PRIVILEGES;
5.Install PHP
https://docs.filerun.com/php_configuration
FileRun requires PHP version 7.3 or newer. PHP 8 is not yet supported.
5.1.Install PHP 7.4
PHP is the component of our setup that will process code to display dynamic content to the final user. In addition to the php package, you’ll need php-mysql, a PHP module that allows PHP to communicate with MySQL-based databases.
Add PHP PPA Repository
sudo add-apt-repository ppa:ondrej/php
sudo apt-get update
Enter the following command to install PHP 7.4 and the extensions needed by FileRun.
sudo apt install imagemagick ffmpeg php7.4 php-imagick php7.4-mysql php7.4-cli php7.4-fpm php7.4-common php7.4-gd php7.4-json php7.4-opcache php7.4-curl php7.4-zip php7.4-xml php7.4-mbstring php7.4-bz2 php7.4-intl php7.4-ldap
5.2.Install ionCube extension
Download the package (Linux ARM 64 bit):
wget https://downloads.ioncube.com/loader_downloads/ioncube_loaders_lin_aarch64.tar.gz
And extract it
sudo tar -xzf ioncube_loaders_lin_aarch64.tar.gz -C /usr/lib/php
copy loader-wizard.php to your website root dir. It will be used to verify the installation at the end.
Check extension dir
php -i | grep extension_dir
extension_dir => /usr/lib/php/20190902 => /usr/lib/php/20190902
copy so file to extension dir
cp /usr/lib/php/ioncube/ioncube_loader_lin_7.4.so /usr/lib/php/20210902
create a ioncube ini file
echo 'zend_extension=/usr/lib/php/ioncube/ioncube_loader_lin_7.4.so' > /etc/php/7.4/fpm/conf.d/00-ioncube-loader.ini
all done. verify the insallation.
your_domain.com/loader-wizard.php

remove loader-wizard.php
5.3. filerun INI file
With the ionCube extension installed, let’s create a file which will automatically get appended by PHP to its configuration. This will include all the settings needed by FileRun.
sudo vi /etc/php/7.4/fpm/conf.d/filerun.ini
Paste the following inside the created file:
expose_php              = Off
error_reporting         = E_ALL & ~E_NOTICE
display_errors          = Off
display_startup_errors  = Off
log_errors              = On
error_log               = "/var/log/php7.4-fpm.log"
ignore_repeated_errors  = Off

allow_url_fopen         = On
allow_url_include       = Off
variables_order         = "GPCS"
allow_webdav_methods    = On
memory_limit            = 128M
max_execution_time      = 300
output_buffering        = Off
output_handler          = ""
zlib.output_compression = Off
zlib.output_handler     = ""
safe_mode               = Off
register_globals        = Off
magic_quotes_gpc        = Off
date.timezone            = "America/Toronto"

file_uploads            = On
upload_max_filesize     = 10240M
post_max_size           = 10240M

enable_dl               = Off
disable_functions       = ""
disable_classes         = ""

session.save_handler     = files
session.use_cookies      = 1
session.use_only_cookies = 1
session.auto_start       = 0
session.cookie_lifetime  = 0
session.cookie_httponly  = 1
session.cookie_secure    = 1
Note: You can find the latest FileRun recommended PHP settings here: https://docs.filerun.com/php_configuration
5.4.Config conf file
./etc/php/7.4/fpm/pool.d/www.conf
user = <user_name>
group = <user_name>

listen.owner = <user_name>
listen.group = <user_name>
listen.mode  = 0660

env[HOSTNAME] = $HOSTNAME
env[PATH] = /usr/local/bin:/usr/bin:/bin
env[TMP] = /tmp
env[TMPDIR] = /tmp
env[TEMP] = /tmp
Comment out this line:
;listen.acl_users = apache,nginx
config service prot:
listen = /run/php/php7.4-fpm.sock
5.5.Additional configuration
upload_max_filesize, which defines the maximum allowed size for uploaded files (default is 2 MB).
post_max_size, which defines the maximum size of POST data that PHP will accept. This setting also affects the file uploads (default is 8 MB).
5.6.Restart PHP-FPM
systemctl restart php7.4-fpm
Enable auto-start at boot time.
systemctl enable php7.4-fpm
Check status:
systemctl status php7.4-fpm
The output will read active (running).
6.Install Nginx Web Server
6.1.Install Nginx
Nginx is a high-performance web server and very popular these days. It also can be used as a reverse proxy and caching server. Enter the following command to install Nginx Web server.
apt install nginx
After it’s installed, we can enable Nginx to auto-start at boot time by running the following command.
systemctl enable nginx
Then start Nginx with this command:
systemctl start nginx
6.2.Allow Nginx Traffic
Nginx needs access through the system’s firewall. To do this, Nginx installs a set of profiles for the Ubuntu default ufw (UnComplicated Firewall).
Start by displaying the available Nginx profiles:
sudo ufw app list

Available applications:
  Nginx Full
  Nginx HTTP
  Nginx HTTPS
  OpenSSH
To grant Nginx access through the default Ubuntu firewall, enter the following:
sudo ufw allow 'nginx http'
sudo ufw allow 'nginx https'
sudo ufw allow 'nginx full'
Refresh the firewall settings by entering:
sudo ufw reload
sudo ufw status numbered
     To                         Action      From
     --                         ------      ----
[ 1] 22/tcp                     ALLOW IN    Anywhere
[ 2] Nginx HTTP                 ALLOW IN    Anywhere
[ 3] Nginx HTTPS                ALLOW IN    Anywhere
[ 4] Nginx Full                 ALLOW IN    Anywhere
6.3.Test Nginx
Make sure that the Nginx service is running, as in Step 2. Open a web browser, and navigate to the following web address:
http://127.0.0.1
The system should display the Nginx welcome page.
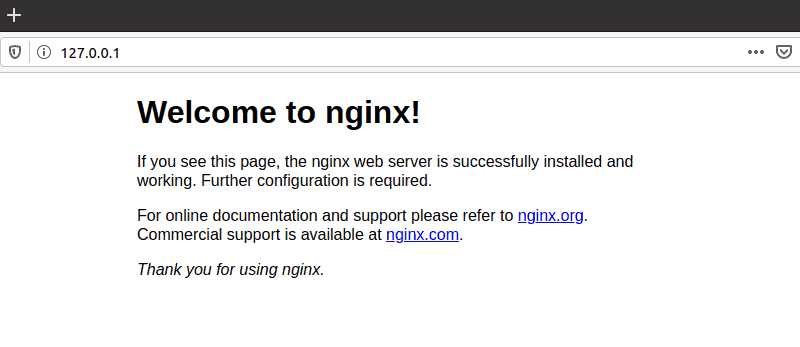
NOTE: If the system has a specific hostname or IP address, that may be used instead.
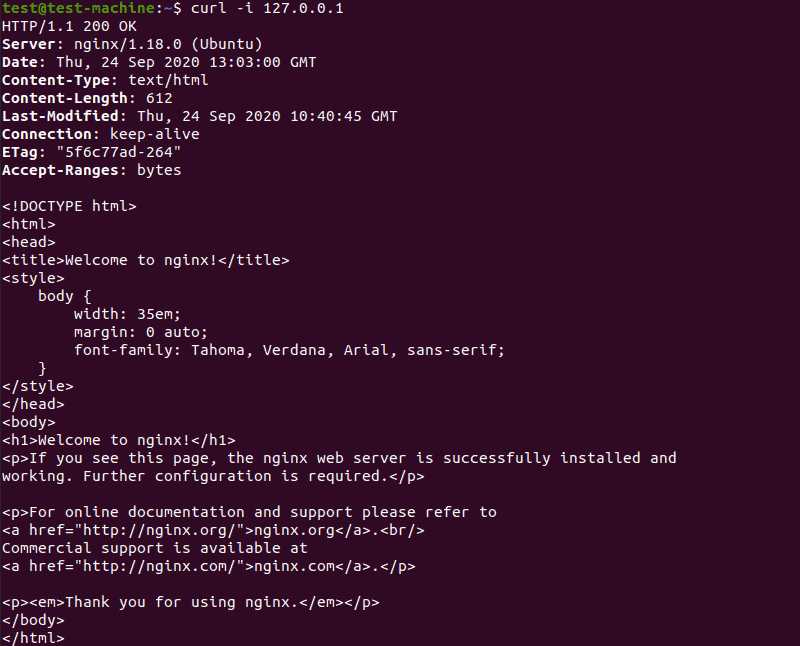
If the system does not have a graphical interface, the Nginx Welcome page can be loaded in the terminal using curl:
sudo apt-get install curl
curl –i 127.0.0.1
The system should display the HTML code for the Nginx Welcome page.
6.4.change user name in nginx conf file
user <user name>
6.5.change owner and group of /var/lib/nginx
chown -R <user>:<group> /var/lib/nginx
7.Installing FileRun
7.1.Prepare webserver root folder
Clean the default files from the root folder of your webserver (/var/www/html/):
cd /var/www/html/
sudo rm index.nginx-debian.html
7.2.Download FileRun
sudo wget -O FileRun.zip https://filerun.com/download-latest-ubuntu-nginx
Extract the downloaded FileRun archive:
unzip FileRun.zip
7.3.Change onwership
Make the HTTP server the owner of the folder so that it can make change:
chown -R USER:USER /var/www/html/
sudo chmod –R 755 /var/www/html/
7.4.Create Nginx Server Block Configuration
Create an Nginx Server Block. An NGINX server block is like a virtual host in Apache. We will not use the default server block because it’s inadequate to run PHP code and if we modify it, it becomes a mess. So remove the default symlink in sites-enabled directory by running the following command. (It’s still available as /etc/nginx/sites-available/default.)
rm /etc/nginx/sites-enabled/default
Open the configuration file for editing:
sudo vi /etc/nginx/sites-available/filerun.conf
server {
  listen 80;
  listen [::]:80;
  server_name _;
  root /var/www/html/;
  index index.php index.html;

  client_max_body_size 100M;

  location / {
    try_files uriuri/ /index.php;
  }

  location ~ [^/]\.php(/|) {
    fastcgi_split_path_info ^(.+?\.php)(/.*);
    if (!-f document_rootfastcgi_script_name) {
        return 404;
    }


    include fastcgi_params;
    include snippets/fastcgi-php.conf;

    fastcgi_param SCRIPT_FILENAME document_rootfastcgi_script_name;
    fastcgi_param PATH_INFO fastcgi_path_info;
    fastcgi_pass unix:/run/php/php7.4-fpm.sock;
  }

 # A long browser cache lifetime can speed up repeat visits to your page
  location ~* \.(jpg|jpeg|gif|png|webp|svg|woff|woff2|ttf|css|js|ico|xml) {
       access_log        off;
       log_not_found     off;
       expires           360d;
  }

  # disable access to hidden files
  location ~ /\.ht {
      access_log off;
      log_not_found off;
      deny all;
  }
}
Create Symbolic Link for Nginx to Read on Startup.
Create a symbolic link between the server block and the startup directory by entering the following:
ln -s /etc/nginx/sites-available/filerun.conf /etc/nginx/sites-enabled/filerun.conf
Then test the NGINX configuration:
sudo nginx -t
If the test is successful, Restart the Nginx Service:
sudo systemctl restart nginx
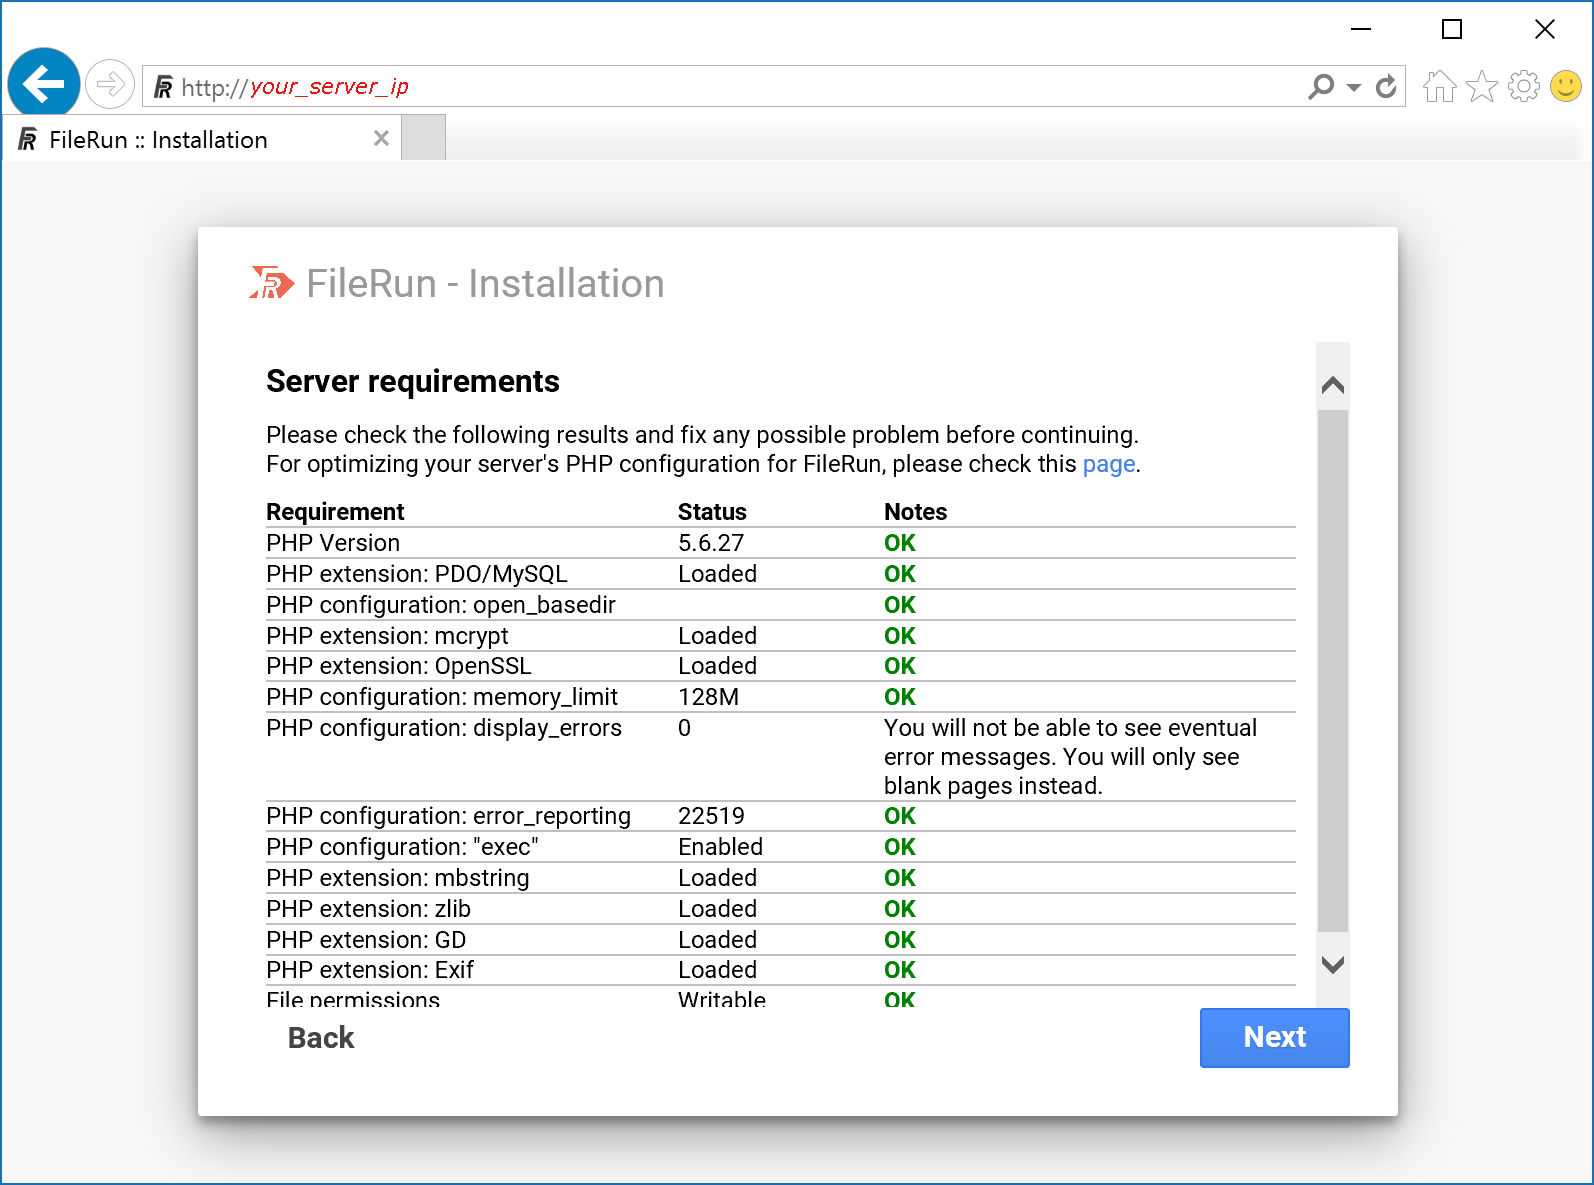
7.5.follow the installer
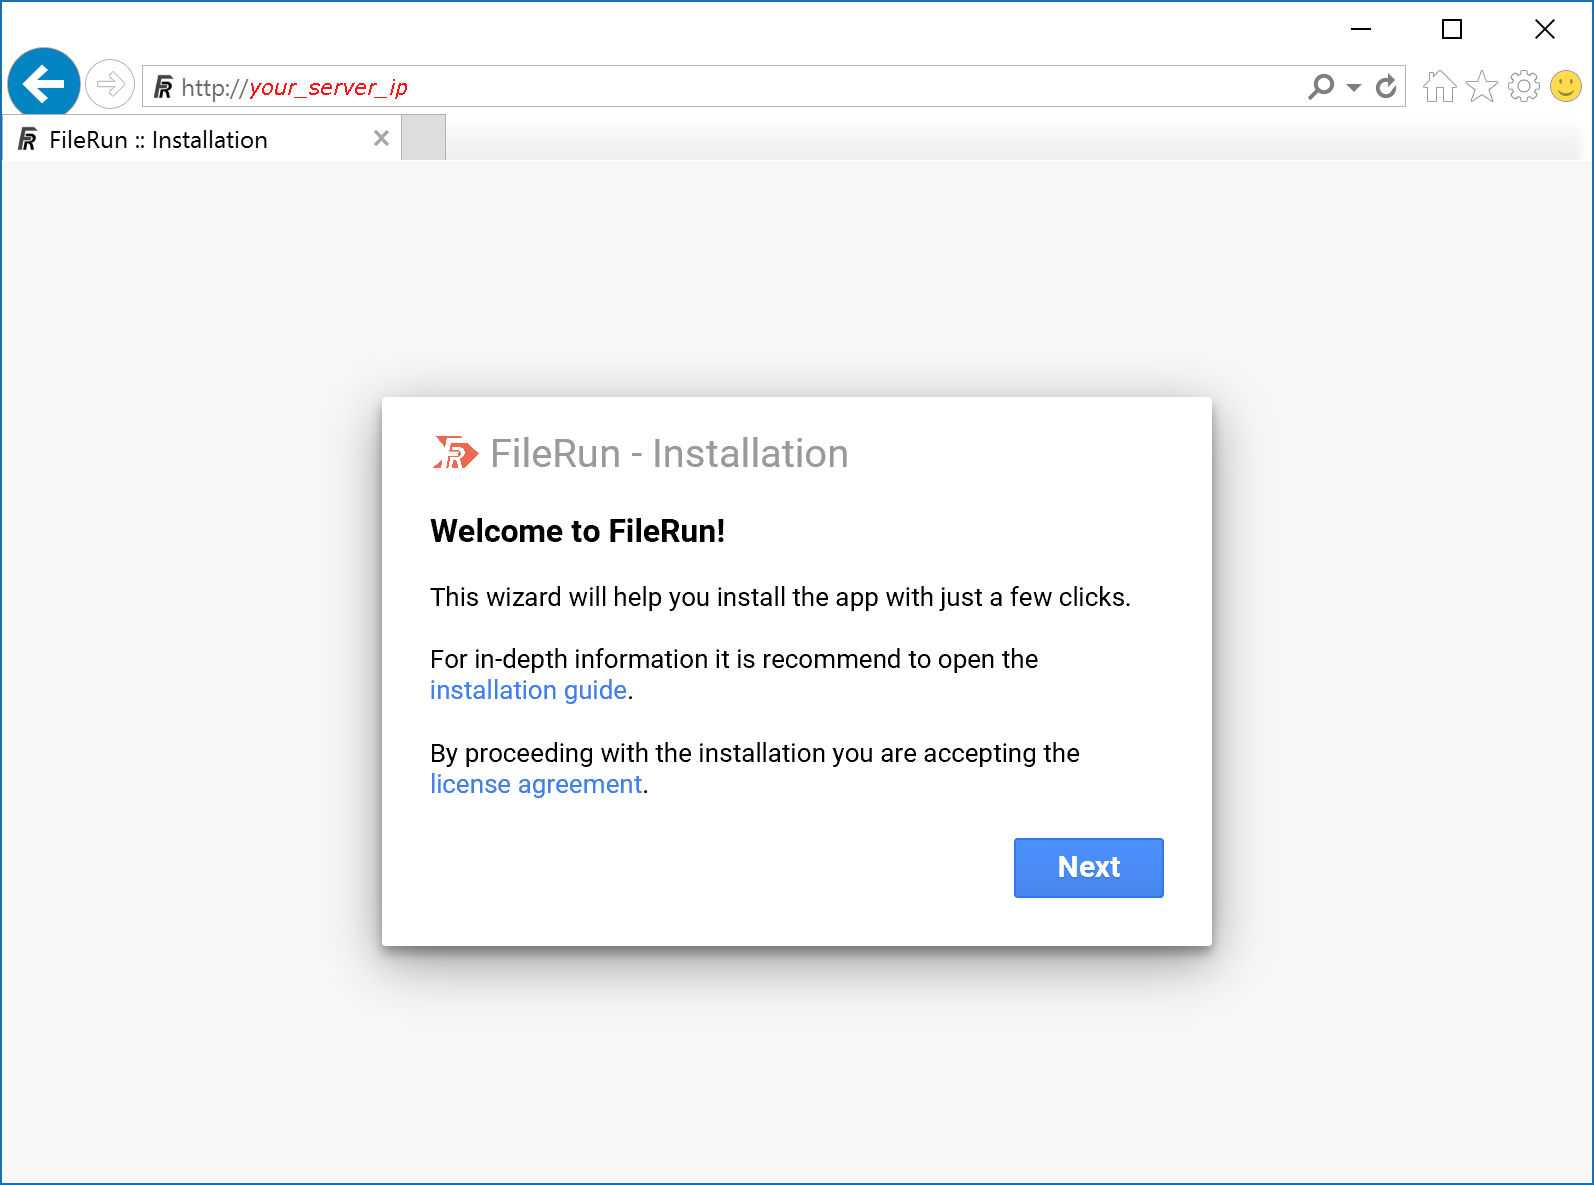
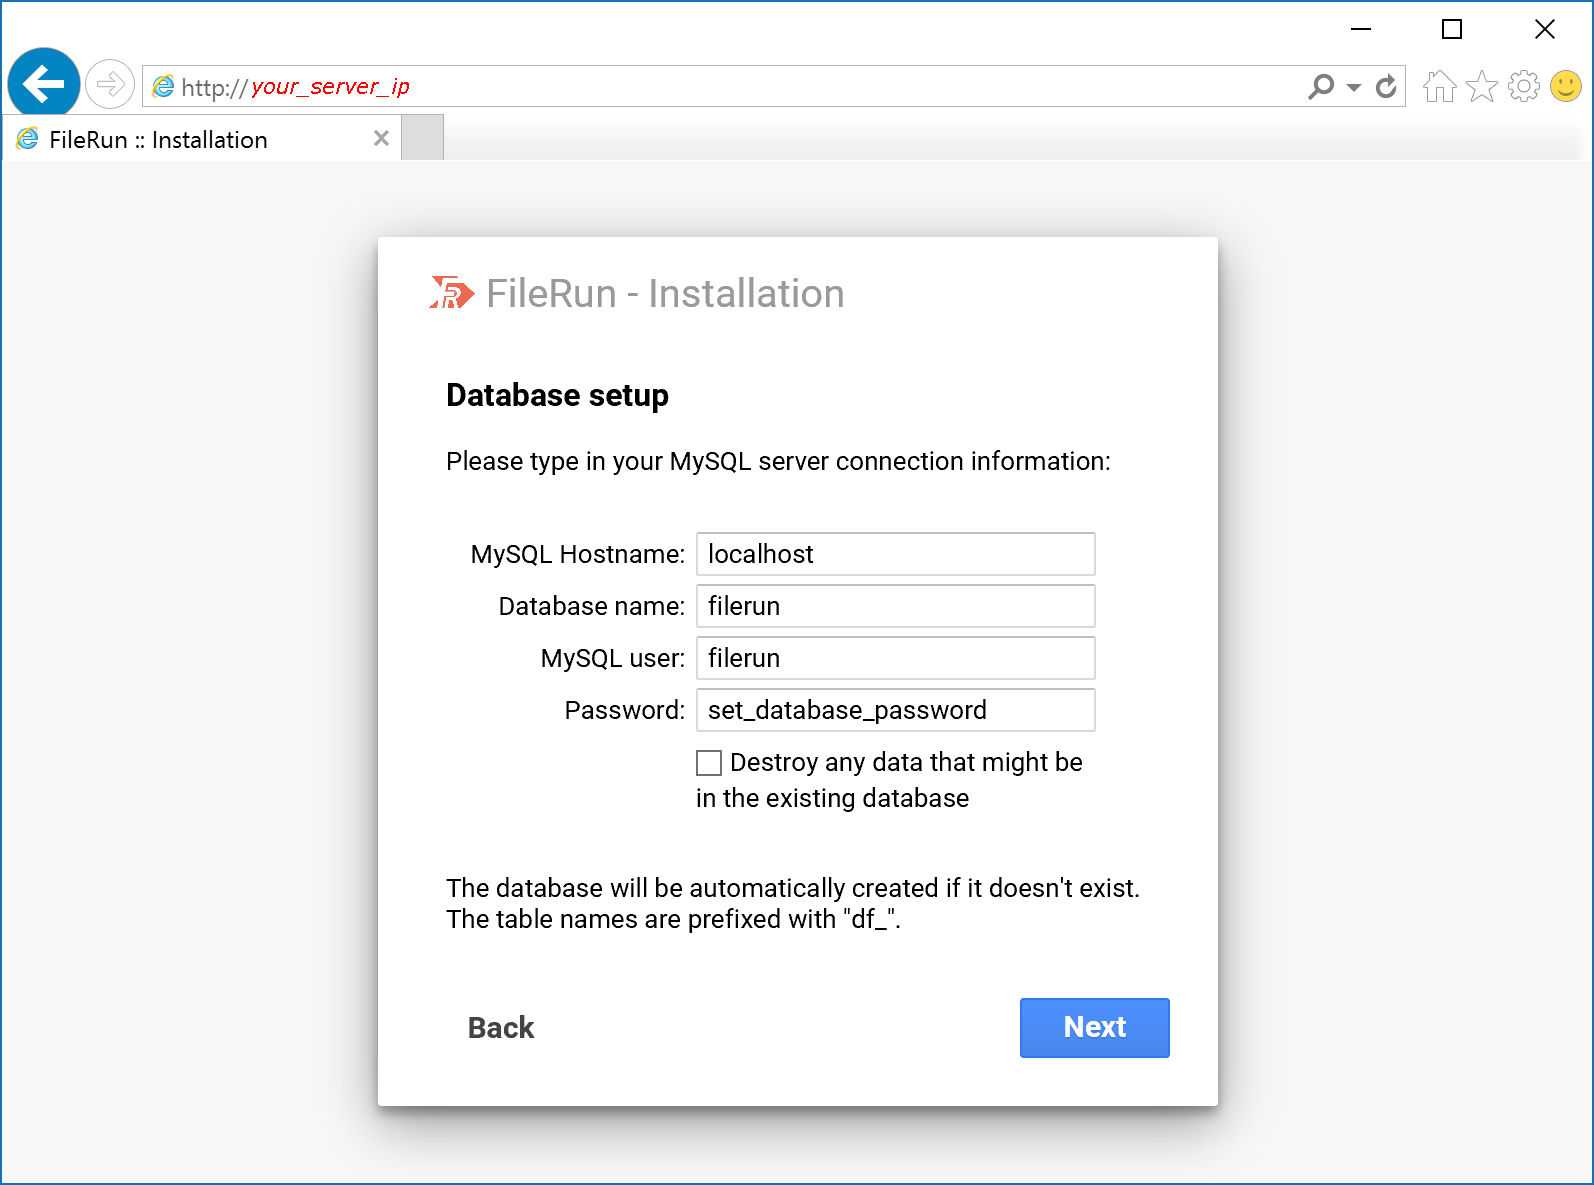
Click Next to proceed with the database connection setup:
- Type in the Database name you used at the step 2 of this tutorial: filerun
- Type in the MySQL user: filerun
- Type in the Password: YOUR-DB-PASSWORD
- Then click Next
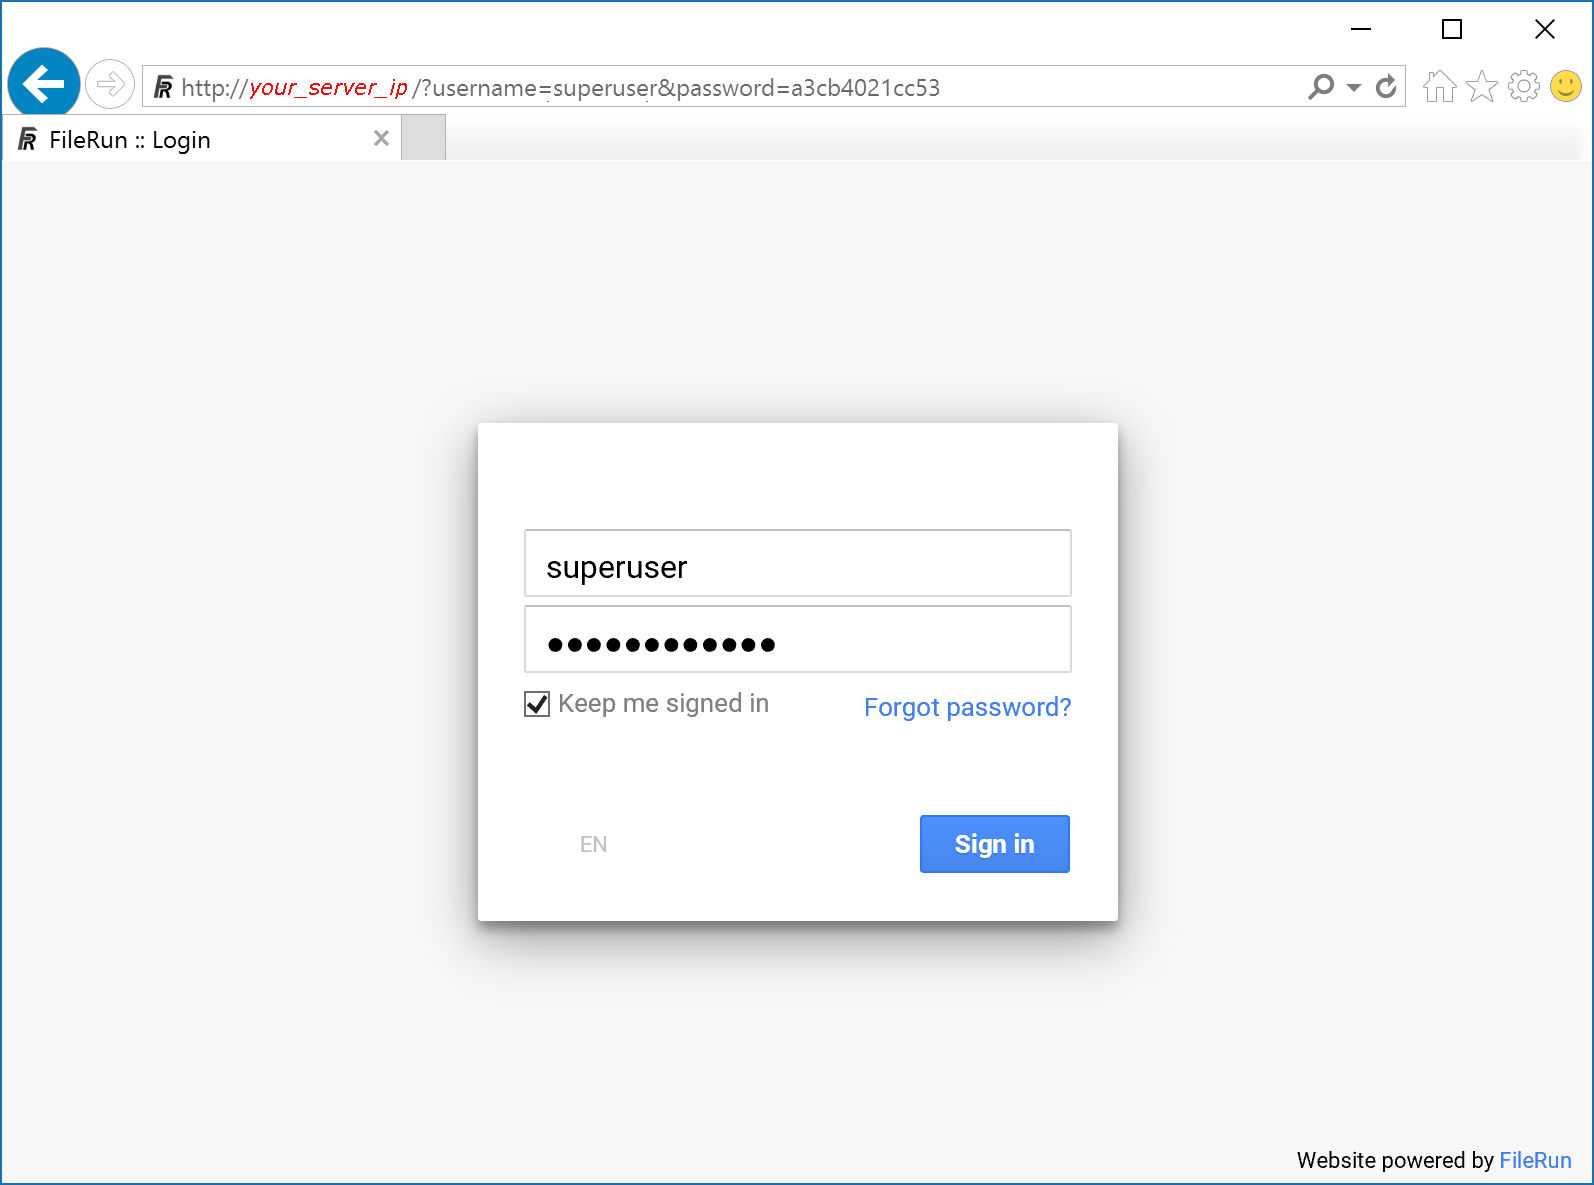
You will be presented with the following screen, letting you know that FileRun has been successfully installed:
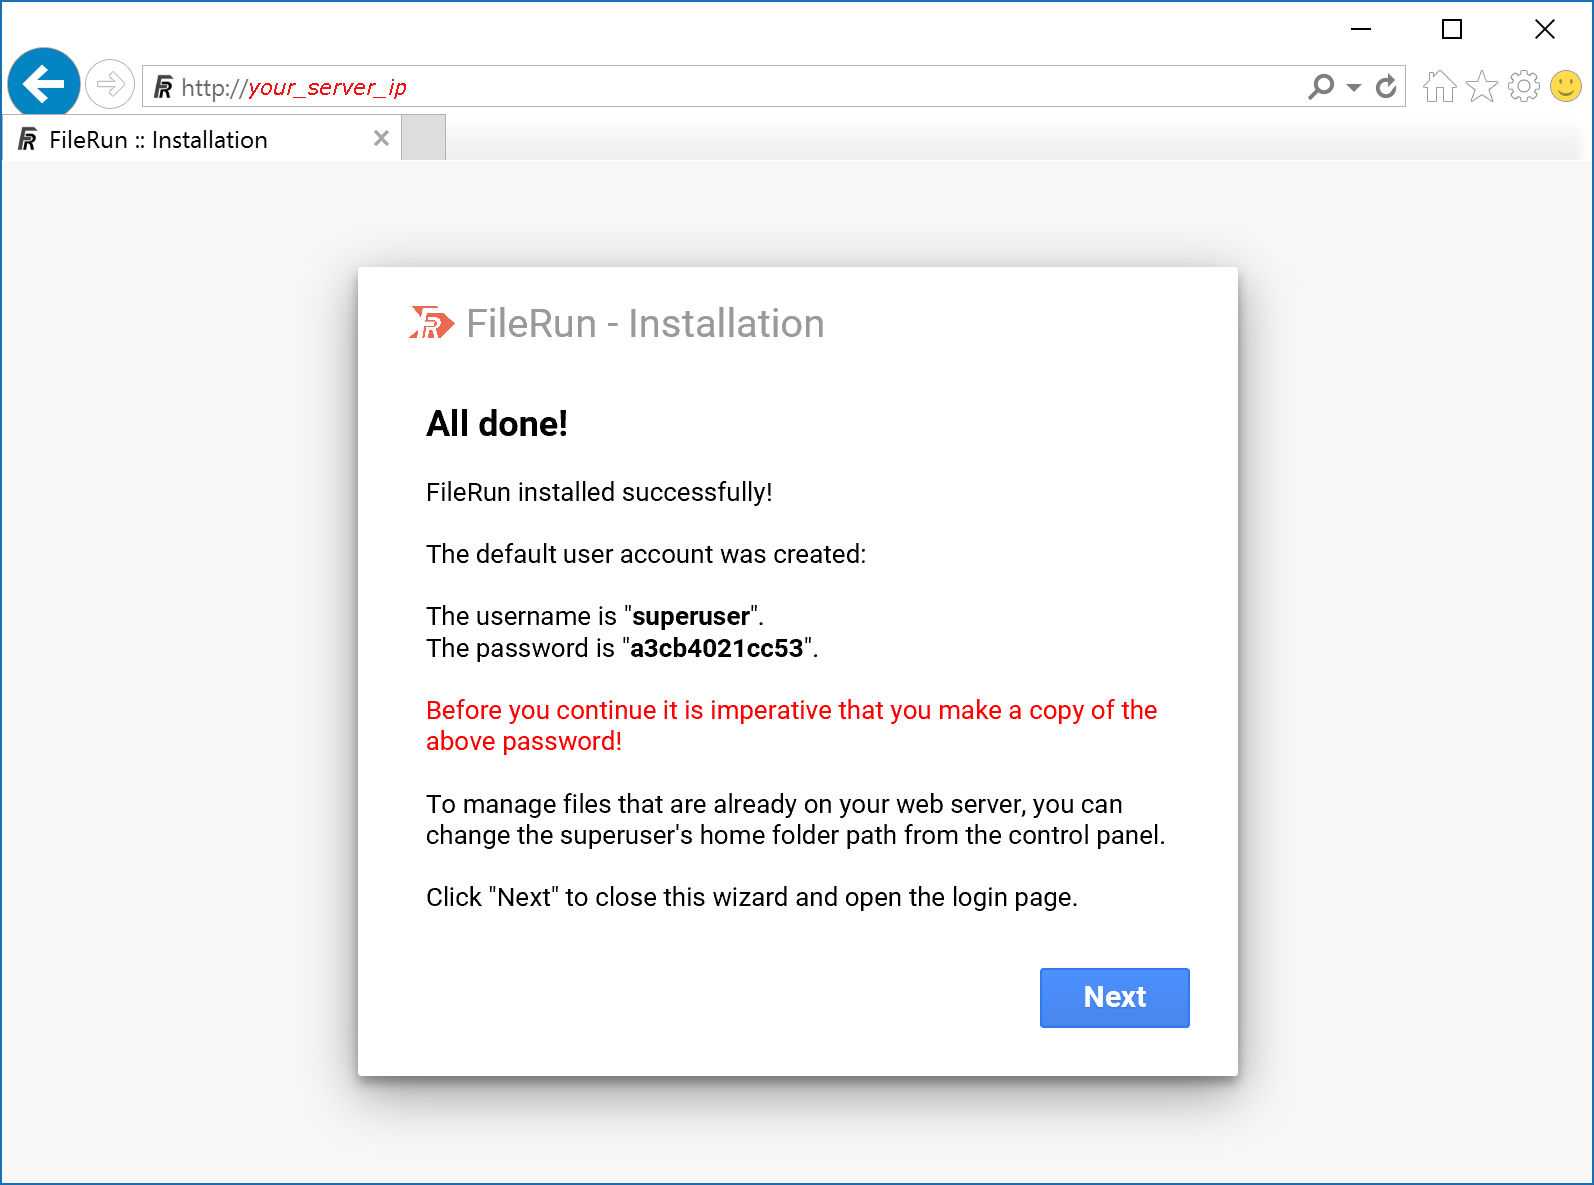
Warning: Make sure you made a copy of the username and password displayed on the screen, before proceeding. The password is being randomly generated at this step. Do not use the password from this tutorial screenshot, it won’t work on your install.
Click Next to open FileRun. You should see the login page:
7.6.Securing the FileRun installation
The permissions of the FileRun application files should not allow PHP (or any other web server application) to make changes to them:
sudo chown -R root:root /var/www/html
The system/data FileRun folder is the only folder where PHP needs write access
sudo chown -R www-data:www-data /var/www/html/system/data
7.7.Set home folder
It is important that the home folder path is pointing to a folder which is located outside the public area of your web server (ie. outside /var/www/html).
You could create a folder /files and store all the FileRun files in there:
sudo mkdir /files
sudo chown www-data:www-data /files
8.Enabling HTTPS with Nginx
8.1.Getting a Let’s Encrypt certificate
Getting a Let’s Encrypt certificate is straightforward thanks to Certbot. Certbot is a free, open source software tool for requesting, receiving, and renewing Let’s Encrypt certificates.
Firstly, go to the Certbot website and choose your webserver and OS.
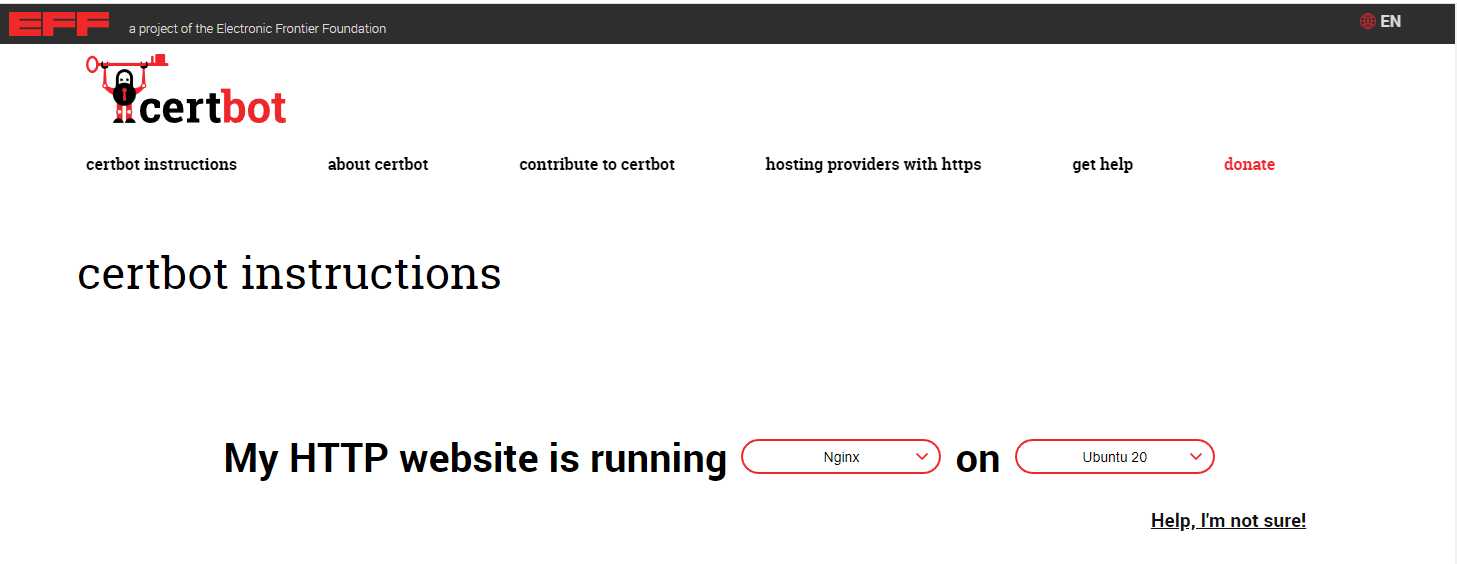
Secondly, follow the detailed instructions then shown.
8.2.Modifying Nginx configuration file
    listen 443 ssl;

    # RSA certificate
    ssl_certificate /etc/letsencrypt/live/<domain_name>/fullchain.pem;
    ssl_certificate_key /etc/letsencrypt/live/<domain_name>/privkey.pem;
    ssl_protocols TLSv1.3 TLSv1.2 TLSv1.1 TLSv1;
    ssl_prefer_server_ciphers on;
    ssl_session_cache shared:SSL:10m;
    ssl_session_timeout 5m;
    ssl_ciphers "EECDH+AESGCM:EDH+AESGCM:AES256+EECDH:AES256+EDH";
    add_header Strict-Transport-Security "max-age=31536000; includeSubDomains" always;
    # managed by Certbot
Finally, make sure your config file does not contain syntax errors and restart Nginx for the configuration changes to take effect:
nginx -t
systemctl restart nginx
8.3.Using Perfect Forward Secrecy
Enable Diffie-Hellman (DH) key-exchange. Generate DH parameters and write them in a .pem file using the following command:
openssl dhparam 2048 > /etc/nginx/dhparam.pem # Generates DH parameter of length 2048 bits
The generation of the the DH parameters may take some time depending on the server’s processing power.
Add the following directive in the HTTPS server block:
ssl_dhparam /etc/nginx/dhparam.pem;
9.Set Up an FTP Server
9.1.Installing vsftpd
sudo apt-get update
sudo apt-get install vsftpd
Back up the original config file
sudo cp /etc/vsftpd.conf /etc/vsftpd.conf.original
9.2.Allowing FTP Traffic from the Firewal
sudo ufw status
sudo apt-get install ufw
sudo ufw enable

sudo ufw allow 20/tcp
sudo ufw allow 21/tcp

sudo ufw allow 64100:64200/tcp
sudo ufw reload
ports 64100:64200 will be reserved for the range of passive ports that will eventually be set in the configuration file.
9.3.Creating the User Directory
mkdir /home/#USER/ftp
9.4.Configuring vsftpd
listen=NO
listen_ipv6=YES
anonymous_enable=NO
local_enable=YES
dirmessage_enable=YES
use_localtime=YES
xferlog_enable=YES
connect_from_port_20=YES
pam_service_name=vsftpd
write_enable=YES

chroot_local_user=yes
# You may specify an explicit list of local users to chroot() to their home
# directory. If chroot_local_user is YES, then this list becomes a list of
# users to NOT chroot().
chroot_list_enable=YES
chroot_list_file=/etc/vsftpd/chroot_list

allow_writeable_chroot=YES

user_sub_token=#USER
local_root=/home/#USER/

userlist_enable=YES
userlist_file=/etc/vsftpd.userlist
userlist_deny=NO

rsa_cert_file=/etc/ssl/certs/ssl-cert-snakeoil.pem
rsa_private_key_file=/etc/ssl/private/ssl-cert-snakeoil.key
ssl_enable=YES

pasv_enable=Yes
pasv_max_port=64200
pasv_min_port=64100
port_enable=YES
chroot
Ensure that the FTP user only accesses files within the allowed directory
A chroot on Unix and Unix-like operating systems is an operation that changes the apparent root directory for the current running process and its children.
If chroot_local_user=yes then users get chroot’d to their home directories UNLESS they are listed in chroot_list_file (in which case they have normal access to the entire file system).
List any exceptions (users you do not want chroot’d) in chroot_list_file.
pasv_max_port
To ensure that a substantial amount of connections are available, we will limit the number of ports the configuration file:
pasv_max_port=64200
pasv_min_port=64100
There are two ways to open this connection:
Passive mode: This is what you use. In this case the FTP server allocates a random port on the server and tells the client IP and port using the response to the passive command. In you case this is “227 Entering Passive Mode (10,0,2,15,224,245)”, which means the server waits at IP 10.0.2.15 port 57589. Since the client does not now that 10.0.2.15 is the server and since port 57589 on the server is not accessible from outside the connection will fail.
Active mode: Here the client opens a listener on a random port and informs the server about this port. The server will then try to connect from port 20 to this port. This might work if the Ubuntu 14.04 system inside the VirtualBox can access the host system (12.04). If this is possible depends on your setup.
9.5.Create a user list
echo "$USER" | sudo tee -a /etc/vsftpd.userlist
cat /etc/vsftpd.userlist
9.6.Restart the daemon
sudo systemctl restart vsftpd
sudo systemctl status vsftpd
9.7.Making FTP Secure
sudo openssl req -x509 -nodes -days 365 -newkey rsa:2048 -keyout /etc/ssl/private/vsftpd.pem -out /etc/ssl/private/vsftpd.pem
rsa_cert_file=/etc/ssl/private/vsftpd.pem
rsa_private_key_file=/etc/ssl/private/vsftpd.pem

ssl_enable=YES
allow_anon_ssl=NO
force_local_data_ssl=YES
force_local_logins_ssl=YES

ssl_tlsv1=YES
ssl_sslv2=NO
ssl_sslv3=NO
Disable SSL reuse to prevent FTP clients from breaking down. Secondly, we will use high encryption cipher suites, which make sure that key lengths are either equal to or greater than 128 bits.
require_ssl_reuse=NO
ssl_ciphers=HIGH
10.Advance Configurations
10.1.Setting the time zone
Open the file customizables/config.php (create if doesn’t exist and make sure it starts with <php on the first line) in a text editor and add the following line:
date_default_timezone_set("Asia/Tokyo");
Replace Asia/Tokyo with your desired location. You can find here a list of available timezone codes for various locations on the planet: http://www.php.net/manual/en/timezones.php
10.2.Enabling thumbnails and previews
Installing ImageMagick
Install ImageMagick using the APT Package Repository.
First of all, update your system’s APT cache repository by typing the command given below:
apt update
After updating your system’s package repository, install ImageMagick using the command given below:
apt install imagemagick
Once ImageMagick is installed, confirm the installation by typing the command provided below:
convert logo: logo.gif
If a logo file of ImageMagick is created in your “Home” directory, it means that the ImageMagick is successfully installed on your system.
PDF Support
For ImageMagick/GraphicsMagick to be able to generate thumbnails for PDF documents you might also need to install Ghostscript.
Make sure the Ghostscript app also has permissions to write to the server’s temporary folder.
GPL Ghostscript is used for PostScript/PDF preview and printing. Usually as a back-end to a program such as ghostview, it can display PostScript and PDF documents in an X11 environment.
Furthermore, it can render PostScript and PDF files as graphics to be printed on non-PostScript printers. Supported printers include common dot-matrix, inkjet and laser models. GPL Ghostscript is used for PostScript/PDF preview and printing. Usually as a back-end to a program such as ghostview, it can display PostScript and PDF documents in an X11 environment.
Install ghostscript Using apt-get – Option 1
Update apt database with apt-get using the following command.
sudo apt-get update
sudo apt-get -y install ghostscript
Install ghostscript Using apt – Option 2
sudo apt update
sudo apt -y install ghostscript
ghostscript -v
After installation, you will need to manually enable the use of these third-party utility programs in FileRun’s control panel, under Files » Thumbnails and preview.
Issues
Issue 1: Can’t load Ioncube Loader
- Before doing anything else go to the Ioncube Loader product page:
https://www.ioncube.com/loaders.php
2.Then from that page you need to download the .zip file containing the file loader-wizard.php.
You may use wget from an SSH session to download the file. i.e.
wget https://www.ioncube.com/loader-wizard/loader-wizard.zip
2a. Don’t forget to unzip that .zip archive. It will create a sub directory called ‘ioncube’ which contains 2 files. You only need to be concerned with loader-wizard.php which you can copy (cp) to your web site. This file should be placed anywhere in your web site or under public_html.
3.From your web browser point to that file. i.e. http://mywebsite.com/loader-wizard.php
4.You should be presented with a page generated by loader-wizard.php which explains exactly what needs to be carried out for your system.
5.That’s it. Any encoded php file should now be executed successfully.
Issue 2: VSFTP can’t open softlink folder
A symbolic link is a pointer to the “right” file. But if that original file is outside the jail then you can’t access it. This is the goal of a jail. Otherwise a normal user could create a symbolic link in the jail to /etc/passwd and just read it. What a security risk!
So jailed is jailed. Probably a hard link will do the job, as this is a “copy without duplicating the used size”. And for the FTP server it is like a normal file (with all the problems).
You can use the bind option of mount to remount the other folder so the FTP server sees the files as being within the root of the website.
You could mount /home/shared/files/ under /home/website/files/ like this.
Create a mount point (a directory) in /home/website
mkdir /home/website/files/
Mount the other directory under this mount point:
mount --bind /home/shared/files /home/website/files/
It will now appear that those files are actually under /home/website/ so will be available even if you restrict the user to this website root directory.
you can edit the file /etc/fstab and add the line :
/var/www/website /home/userftp/html auto bind,defaults 0 0
Issue 3: You are allowed to upload only files smaller than 20MB
Increase the values of “upload_max_filesize” and “post_max_size” in your PHP configuration (php.ini).
Changed Settings under the admin settings (the gear), then click on a user and click the edit button.
Under the permissions tab, scroll to the bottom and change the “Upload max file size” field. It is measured in MB.
Or change the same settings for the role of users.
Issue 4: failed to move to trash
Tried to delete a file.
mkdir -p ~/.local/share/Trash
customizables/config.php
Folder to store the trashed files and folders. If your trash folder is on a separate device/partition/file-system, you will probably want to set $config[‘system’][‘fm’][‘use_safe_move’] = true; otherwise you won’t be able to delete folders to trash due to a PHP limitation.
Issue 5: Failed to delete folder.
Tried to delete a folder.
This is not work:
root@NASPi:cd /mnt/hdd2
mkdir -m777 -v .Trash-1001
chown nas:nas .Trash-1001
Bug 70831 – Bind mount doesn’t allow to trash files and directories
https://bugzilla.kernel.org/show_bug.cgi?id=70831
The function rename(2) throws the error EXDEV when its input/output parameters oldpath and newpath are in different mountpoints:
EXDEV  oldpath and newpath are not on the same mounted filesystem.
         (Linux permits a filesystem to be mounted at multiple points,
         but rename() does not work across different mount points, even
         if the same filesystem is mounted on both.)

[...] this means that one cannot use bind-mounted directories 'normally', because there is no way to 'trash' files from such places, and the only way to delete files is permanent deleting without any possibility to restore such data. And there is not much sense of using bind-mounted directories because of that obscure behavior. [...]
The workaround is to replace the bind-mounted directories with symlinked directories.